This article is an example of a python programming language to command a relay module to turn on/off an LED via WiFi with the ESP8266’s AP mode.

Relay module
Relay is a device that converts electrical energy into magnetic energy through a coil to pull both contact sides to achieve on/off states similarly to an on/off switch.
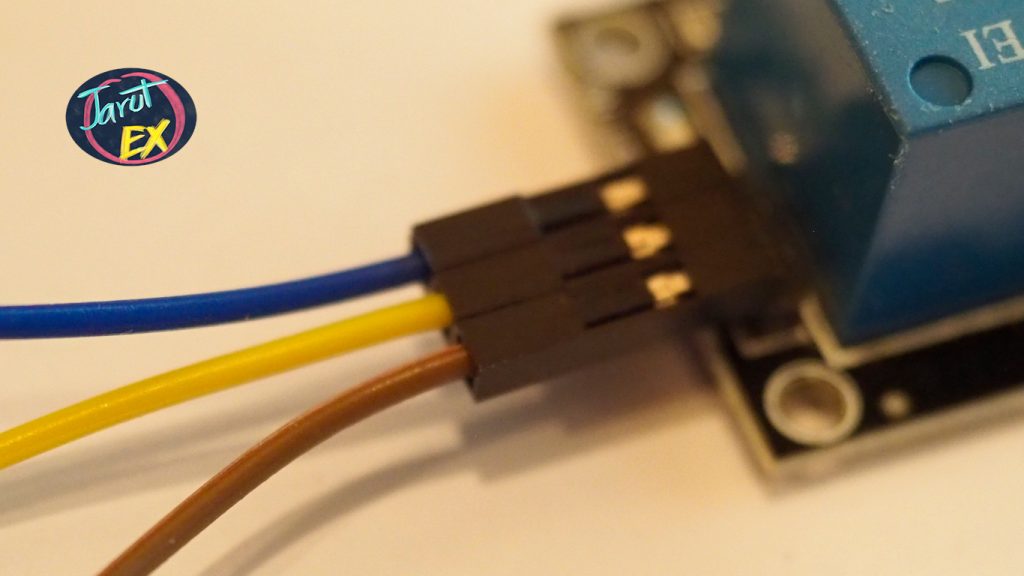
The relay module is a popular module used to drive external loads depending on the properties of the relay chosen. In Figure 2, the relay selected in this experiment is a relay that supports 220VAC/30VDC at 10A or 125VAC/28VDC at 10A using 5VDC voltage and the connecting pin of the relay module for microcontrollers has 3 pins S, + and – for connecting to control pin, Vcc and Gnd, the other side used for connecting to the load. As for how to connect the load to the relay has the following principles:
- COM pin is a pin for connecting to the input pin.
- Pin NC is a pin used when the relay module is in normal condition.
- Pin NO is a pin used when the relay module is supplied with power.

ESP8266 pin connecting
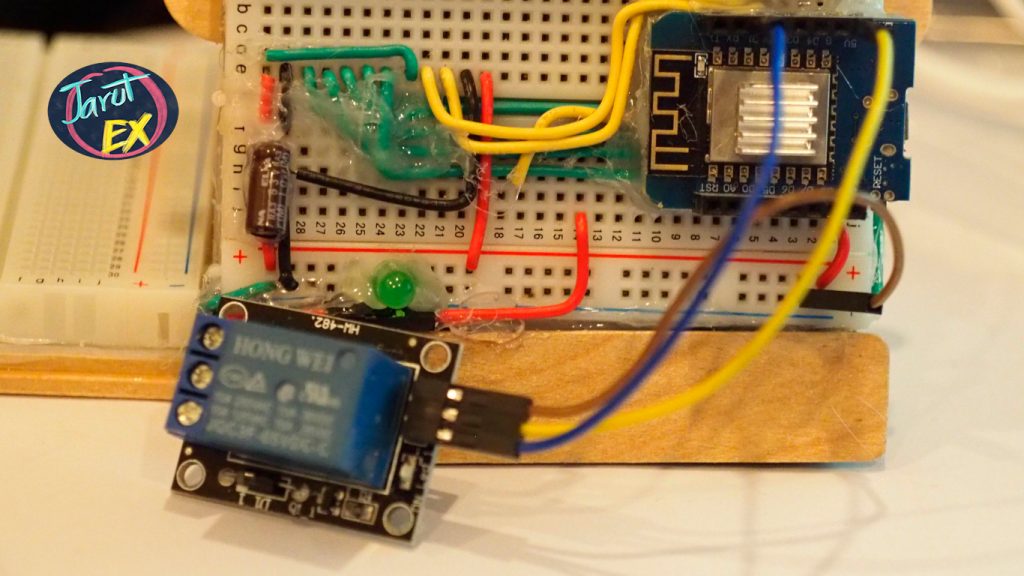
ESP8266 can connect to the relay module by connecting S pin to D1 (or another pin) to use for commanding the relay on or off. Connect + pin to 5VDC or Vin of ESP8266 and connect – pin to GND as shown in figures 3 and 4.
Connection between relay module and LED
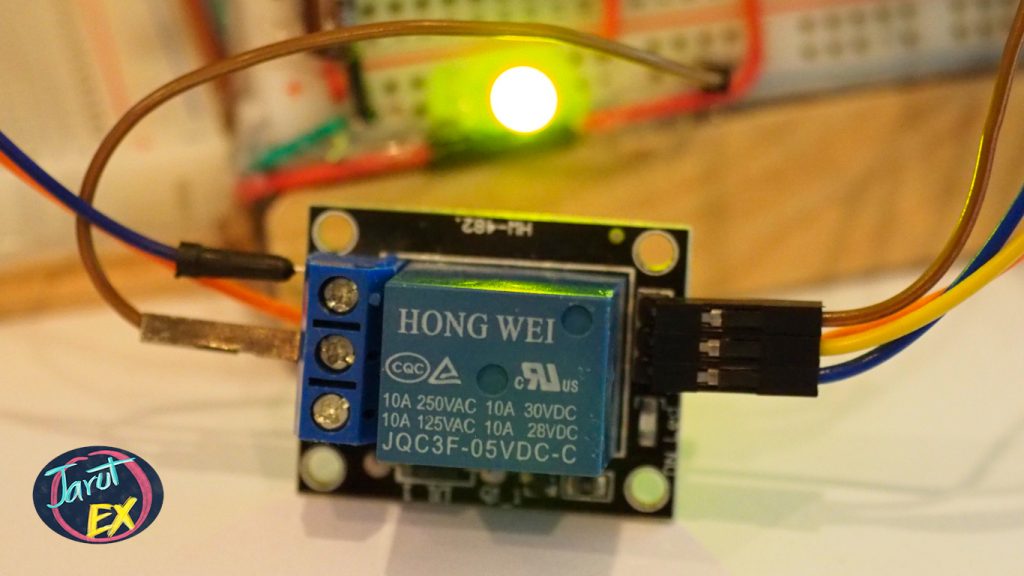
The load LED circuit is connected to the relay module by connecting GND from the LED circuit to NC or NO of the relay module and from COM of the relay module to the GND of the system and the power input to the LED circuit is connected to the 3V3 of the ESP8266.

Commanding circuit through web page
The web-based operations can be performed in several ways, such as having the user enter a URL as an argument to the program. Or create a user interface object and link to a provided URL, etc.
Readings from the user’s web browser must be read from conn.recv (size of buffers) as the following usage pattern:
conn,addr = s.accept()
connectionValue = str( conn.recv(1024) )
After the connection value is obtained and converted to a string, it will be used as an input to the search.
The find command can be used for finding arguments to use as values to create conditions for operations, to find strings converted from connection values, use the following format:
result = string.find( searchText )
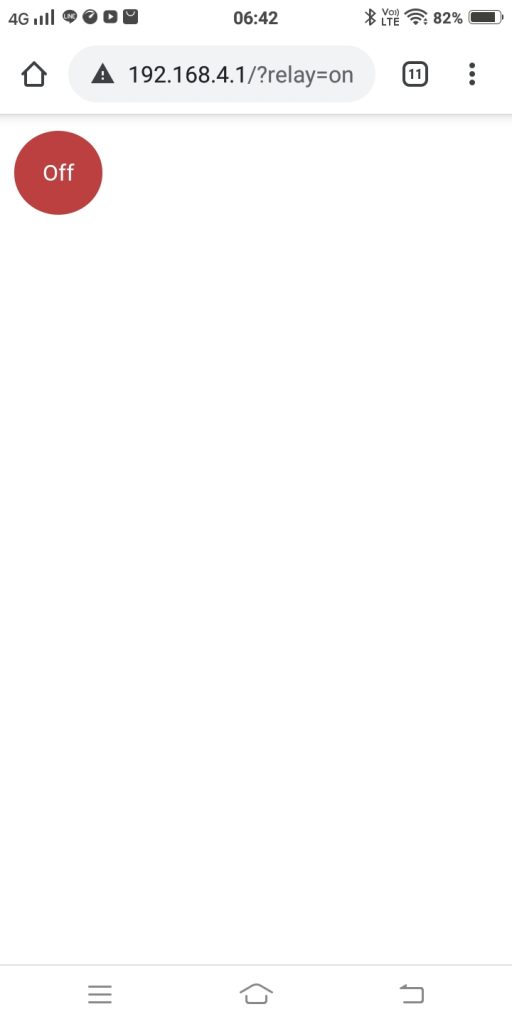
When the desired value is found, it returns 6, so when applied to find the command to open or close, set the URL to relay=on to call ledOn() and relay=off to call ledOff() function, you can write code like this:
s = socket.socket(socket.AF_INET, socket.SOCK_STREAM)
s.bind(('', 80))
s.listen(5)
while True:
    conn, addr = s.accept()
    request = str(conn.recv(1024))
    relay_on = request.find('/?relay=on')
    relay_off = request.find('/?relay=off')
    if relay_on == 6:
        ledOn()
    if relay_off == 6:
        ledOff()
Example code
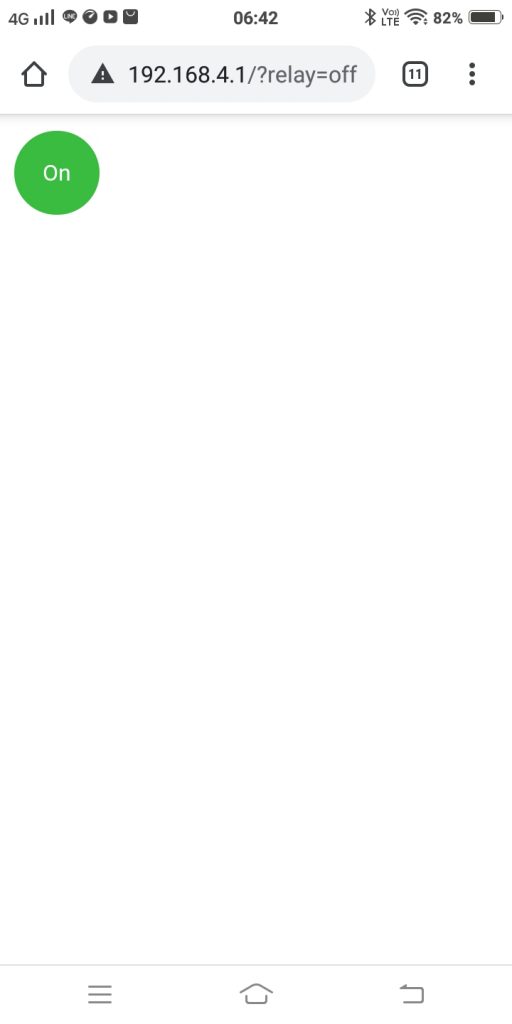
Example program code7-1 sets the relayState value to False to store the state of the relay, so when the program is running, it will display the result as shown in Figure 8, when the user presses the On button, it will change the status to True and turn on the LED which creates the result of the button as shown in figure 7.
# code7-1 relay
# D1 --> Relay (S)
import socket
import network
import esp
import time
import gc
from machine import Pin
from machine import ADC
#---(1)
gc.collect()
relayPin = Pin(5,Pin.OUT) # D1
ap = network.WLAN(network.AP_IF)
#---(2)
ssid = 'JarutEx-AP'
password = '123456789'
relayState = False
ap.active(True)
ap.config(essid=ssid, password=password)
while ap.active() == False:
  pass
print('Connection successful')
#---(3)
def ledOn():
    global relayState
    relayPin.value(1)
    relayState = True
def ledOff():
    global relayState
    relayPin.value(0)
    relayState = False
def web_page():
    global relayState
    html = """
<!DOCTYPE html><html><head><meta name="viewport" content="width=device-width, initial-scale=1">
<style>.button {  border: none;  color: white;  padding: 20px;  text-align: center;  text-decoration: none;
  display: inline-block;  font-size: 16px;  margin: 4px 2px;  cursor: pointer;  border-radius: 52%;
}
.button1 {  background-color: #3ABC40; }
.button2 {  background-color: #BC4040; }
</style></head><body>
"""
    if relayState == False:
        html += "<a href='/?relay=on'><button  class='button button1'>On</button></a>"
    else:
        html += "<a href='/?relay=off'><button class='button button2'>Off</button></a>"
    html += "</body></html>"
    return html
#---(4)
print(ap.ifconfig())
#---(5)
s = socket.socket(socket.AF_INET, socket.SOCK_STREAM)
s.bind(('', 80))
s.listen(5)
#---(6)
while True:
    conn, addr = s.accept()
    print('conn {} from {}'.format(conn, addr))
    request = str(conn.recv(1024))
    print('request = {}'.format(request))
    relay_on = request.find('/?relay=on')
    relay_off = request.find('/?relay=off')
    if relay_on == 6:
        ledOn()
    if relay_off == 6:
        ledOff()
    response = web_page()
    conn.send('HTTP/1.1 200 OK\n')
    conn.send('Content-Type: text/html\n')
    conn.send('Connection: close\n\n')
    conn.send(response)
    conn.close()
Conclusion
From the example of this experiment, it was found that we can drive DC or AC loads through a web site system using a relay module. By connecting the circuit as in the example which was mentioned in this article. Building a good looking display requires coding on the HTML5/CSS side. Besides, choosing a relay module is a factor that must be considered, as if relays are used to drive the load, only DC power will work. If the load limit is 10A when encountering the higher load the relay will be damaged or use a 12VDC relay but without a 12VDC driver or there’s not enough current the relay will not work, etc.
Finally, have fun with programming.
If you want to discuss something, feel free to leave comments below.
(C) 2020, Danai Jedsadathitikul and Jarut Busarathid
ปรับปรุงเมื่อ 2020-10-19