บทความนี้กล่าวถึงการเขียนโปรแกรมแบบหลายเธรดของภาษาไพธอน โดยเรียบเรียงจากเว็บไซต์ tutorialspoint.com (ทำให้บทความนี้เป็นเสมือนบันทึกช่วยจำ) ซึ่งการเรียกใช้หลายเธรดเปรียบเสมือนการเรียกใช้โปรแกรมที่แตกต่างกันหลายโปรแกรมพร้อมกันแต่มีประโยชน์ดังนี้
- แต่ละเธรดสามารถใช้หน่วยความจำร่วมกันกับเธรดหลัก และสามารถสื่อสารระหว่างกันได้
- เธรดเป็นโปรเซสที่มีขนาดเล็กเนื่องจากไม่สิ้นเปลือง over head (หน่วยความจำ) ของการเรียกใช้เหมือนการเรียกโปรเซสเพิ่ม

เธรด
เธรด (Thread) เป็นหน่วยประมวลผล เมื่อเธรดเริ่มทำงาน การทำงานจะเป็นตามลำดับที่เขียนไว้จนเสร็จสิ้น ในการทำงานของเธรดจะมีตัวแปรตัวชี้ตำแหน่งของคำสั่งที่กำลังถูกนำมาประมวลผล โดยที่
- เธรดสามารถถูก pre-empted หรือขัดจังหวะ (interrupted)
- เธรดสามารถถูกสั่งให้หยุดขณะที่เธรดอื่นทำงานอยู่ได้ (เรียกว่า yielding)
ประเภทของเธรด
เธรดแบ่งเป็น 2 ประเภทคือ
- Kernel thread เป็นส่วนหนึ่งของระบบปฏิบัติการ
- User thread
เธรดที่ Python3 รองรับ
ไพธอนรุ่น 3 รองรับเธรดทั้งในแบบใหม่และแบบเก่าด้วยกัน 2 คลาส คือ
- _thread ใช้สำหรับความเข้ากันได้กับเธรดจากไพธอนรุ่นเก่า
- threading เป็นเธรดที่ออกแบบสำหรับใช้กับไพธอนรุ่น 3 และเป็นเธรดที่ทำงานในระดับล่าง (low level thread)
ในภาษาไพธอนเธรดเป็นคลาสที่ครอบการทำงานของ threading
การสร้างเธรดสามารถทำได้โดยใช้รูปแบบการสร้างดังนี้
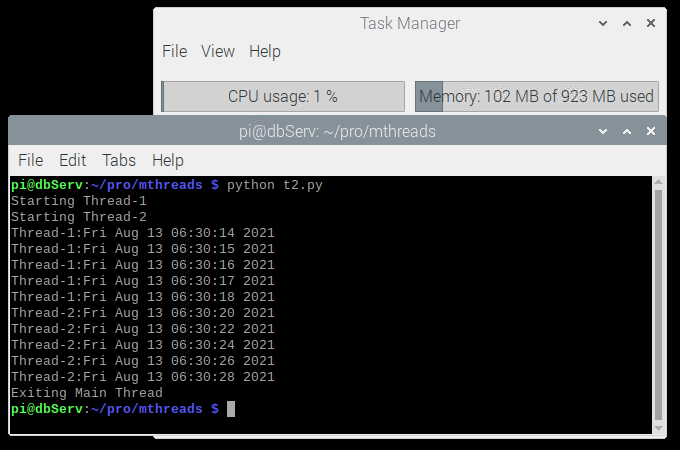
_thread.start_new_thread( function, args [ , kwargs ] )ตัวอย่างการสร้างเธรดจำนวน 2 เธรดโดยให้เธรดชื่อ thread-1 และ thread-2 ที่เกิดจากการทำงานของฟังก์ชันชื่อ print_time แต่มีความแตกต่างที่ thread-1 ส่งพารามิเตอร์ 2 เพื่อเป็นค่าหน่วงเวลาในการทำงาน และ thread-2 ส่งพารามิเตอร์เป็น 4 ดังนั้นทั้ง 2 เธรดจึงทำงานโดยมีค่าหน่วงเวลาที่แตกต่างกัน
# -*- coding: UTF-8 -*-
import _thread
import time

def print_time( thread_name, delay ):
	count = 0
	while count < 5:
		time.sleep( delay )
		count += 1
		print(thread_name + str(time.ctime(time.time())))


def main():
	try:
		_thread.start_new_thread( print_time, ("thread-1", 2))
		_thread.start_new_thread( print_time, ("thread-2", 4))
	except:
		print("Error: unable to start thread")
	while True:
		pass

if __name__=="__main__":
	main()
ภาพตัวอย่างผลลัพธ์เมื่อรันบน Raspberry Pi 3 เป็นดังภาพที่ 1

เมธอดของเธรด
เมธอดที่ threading รองรับได้แก่
- threading.activeCount() คืนค่าจำนวนเธรดทั้งหมดที่ถูกสร้างขึ้น
- threading.currentThread() คืนค่าจำนวนเธรดที่ถูกสร้างโดยเธรดปัจจุบัน
- threading.enumerate() คืนค่าลิสต์ของเธรดที่กำลังทำงาน (active)
เมธอดของเธรดได้แก่
- run() เป็นจุดเริ่มการทำงานของเธรด
- start() เป็นเมธอดเริ่มทำงานที่ถูกเรียกใช้โดย run()
- join([time]) รอจนกว่าเธรดจะ terminate
- isAlive() ตรวจสอบว่าเธรดกำลังทำงานอยู่หรือไม่
- getName() คืนค่าชื่อของเธรด
- setName() ตั้งชื่อให้กับเธรด
การสร้างเธรดจากสืบทอดคลาส threading ของตัวอย่างต่อไปนี้ประกอบไปด้วย 3 ส่วนคือ
- สร้างซับคลาสชื่อ myThread ที่สืบทอดมาจากคลาส Thread
- โอเวอร์ไรด์เมธอด init( self [, args] )
- โอเวอร์ไรด์เมธอด run( self [, args] ) เพื่อเขียนส่วนที่ต้องทำเมื่อเธรดเริ่มต้นทำงาน
# -*- coding: UTF-8 -*-
import threading
import time
class myThread(threading.Thread):
	def __init__( self, thread_id, name, counter ):
		threading.Thread.__init__( self )
		self.thread_id = thread_id
		self.name = name
		self.counter = counter
	def run( self ):
		print("Starting "+self.name)
		print_time( self.name, self.counter, 5 )
		print("Exit "+self.name)
running = 0
def print_time( thread_name, delay, counter ):
	while counter:
		if running:
			thread_name.exit()
		time.sleep(delay)
		print(thread_name +":"+str(time.ctime(time.time())))
		counter -= 1
def main():
	thread1 = myThread(1, "thread-1", 1)
	thread2 = myThread(2, "thread-2", 2)
	thread1.start()
	thread2.start()
	thread1.join()
	thread2.join()
	print("Exiting Main Thread")

if __name__=="__main__":
	main()
ตัวอย่างผลลัพธ์การทำงานบน Raspberry Pi 3 เป็นดังภาพที่ 2

Synchronizing Threads
ไพธอน3 มีเมธอด Lock() ที่ทำให้สามารถทำซิงโครไนซ์เธรดได้ง่ายขึ้น สามารถส่งพารามิเตอร์ blocking ให้แก่เธรดที่ถูกล็อกเพื่อควบคุมการรอหรือไม่ต้องรอจากการล็อก
- ถ้า blocking มีค่าเป็น 0 หมายความว่า เธรดจะคืนค่าเป็น 0 เมื่อไม่สามารถ blocking ได้ และคืนค่าเป็น 1 ถ้าการล็อกกระทำได้สำเร็จ
- ถ้า blocking มีค่าเป็น 1 หมายความว่า เธรดจะถูกบล็อกและรอจนกว่าการล็อกจะถูกยกเลิก
และ เมธอด release() ใช้สำหรับยกเลิกการล็อกเธรด ดังตัวอย่างโปรแกรมต่อไปนี้
# -*- coding: UTF-8 -*-
import threading
import time

thread_lock = threading.Lock()
threads = []

def print_time( thread_name, delay, counter ):
	while counter:
		time.sleep(delay)
		print(thread_name +":"+str(time.ctime(time.time())))
		counter -= 1

class myThread(threading.Thread):
	def __init__( self, thread_id, name, counter ):
		threading.Thread.__init__( self )
		self.thread_id = thread_id
		self.name = name
		self.counter = counter
	def run( self ):
		print("Starting "+self.name)
		thread_lock.acquire()
		print_time( self.name, self.counter, 5 )
		thread_lock.release()
def main():
	# Create new threads
	thread1 = myThread(1, "Thread-1", 1)
	thread2 = myThread(2, "Thread-2", 2)
	# Start new Threads
	thread1.start()
	thread2.start()
	# Add threads to thread list
	threads.append(thread1)
	threads.append(thread2)
	# Wait for all threads to complete
	for t in threads:
		t.join()
	print("Exiting Main Thread")

if __name__=="__main__":
	main()
ตัวอย่างผลลัพธ์ของการทำงานบน Raspberry Pi 3 เป็นดังภาพที่ 3
Multi-threaded Priority Queue
มัลติเธรดคิวแบบมีลำดับความสำคัญ (multi-threaded priority queue) เป็นการประยุกต์ใช้โครงสร้างข้อมูลแบบคิวกับเธรดเข้าด้วยกันทำให้สามารถจัดการกับจำนวนเธรดที่ไม่จำกัดได้ (ขึ้นอยู่กับปริมาณหน่วยความจำที่มี) ซึ่งเมธอดสำหรับควบคุมคิวเป็นดังนี้
- get() นำไอเท็มออกจากคิว
- put() เพิ่มไอเท็มเข้าในคิว
- qsize() คืนค่าจำนวนไอเท็มภายในคิว
- empty() ตรวจสอบสถานะของคิวว่าคิวว่างหรือไม่
- full() ตรวจสอบสถานะของคิวว่าเต็มแล้วหรือไม่
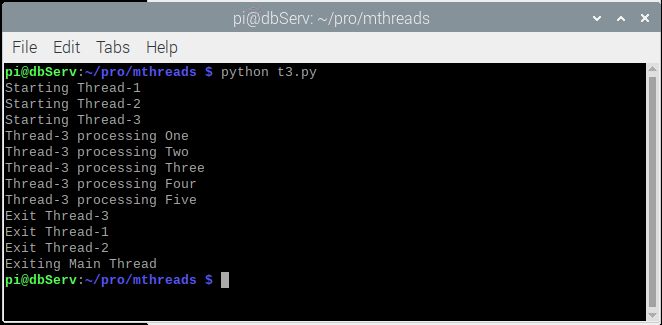
ตัวอย่างโปรแกรมของการใช้งานมัลติเธรดคิวแบบมีลำดับความสำคัญเป็นดังนี้
# -*- coding: UTF-8 -*-
import threading
import time
import queue

running = 1
thread_list = ["Thread-1", "Thread-2", "Thread-3"]
name_list = ["One", "Two", "Three", "Four", "Five"]
queue_lock = threading.Lock()
work_queue = queue.Queue(10)
threads = []
thread_ID = 1

def process_data(thread_name, q):
	while running:
		queue_lock.acquire()
		if not work_queue.empty():
			data = q.get()
			queue_lock.release()
			print( thread_name+" processing "+data)
		else:
			queue_lock.release()
			time.sleep(1)
class myThread(threading.Thread):
	def __init__( self, thread_id, name, q ):
		threading.Thread.__init__( self )
		self.thread_id = thread_id
		self.name = name
		self.q = q
	def run( self ):
		print("Starting "+self.name)
		process_data(self.name, self.q)
		print("Exit "+self.name)

for t_name in thread_list:
	thread = myThread(thread_ID, t_name, work_queue)
	thread.start()
	threads.append(thread)
	thread_ID += 1
queue_lock.acquire()
for word in name_list:
	work_queue.put(word)
queue_lock.release()
while not work_queue.empty():
	pass
running = False
for t in threads:
	t.join()
print ("Exiting Main Thread")
thread_lock = threading.Lock()
threads = []
ตัวอย่างผลลัพธ์ของการทำงานจากโค้ดด้านบนกับ Raspberry Pi 3 ได้ผลดังภาพที่ 4
สรุป
ทั้งหมดเป็นเธรดประเภทต่าง ๆ ที่ไพธอนรุ่น 3 รองรับและตัวอย่างการใช้งานเบื้องต้นเพื่อศึกษาเพิ่มเติมต่อไป ทั้งนี้จะพบว่ามนปัจจุบันมีแหล่งศึกษาเพิ่มเติมจำนวนและหลากหลายภาษา ดังนั้น ผู้ศึกษาการเขียนโปรแกรมต้องปรับตัวให้ทันต่อความเปลี่ยนแปลงที่รวดเร็วและศึกษาจากแหล่งข้อมูลต่าง ๆ อย่างสม่ำเสมอ และทางเราจะนำบทความที่เรียบเรียงไว้ในช่วงอ่านเอกสารเหล่านี้มาอัพให้อ่านกันใหม่ สุดท้ายขอให้สนุกกับการเขียนโปรแกรมครับ
ท่านใดต้องการพูดคุยสามารถคอมเมนท์ไว้ได้เลยครับ
แหล่งอ้างอิง
- Tutorialspoint.com : Python-Multithreaded programming
เรียบเรียงจาก Python-Multithread programming โดย อ.ดนัย เจษฎาฐิติกุล/อ.จารุต บุศราทิจ
ปรับปรุงเมื่อ 2021-08-13, 2021-11-23