pyglet is a Python library to create windows and cross-platform multimedia on Windows (Windows), MacOS (macOS) and Linux (Linux) for developing games or visualization applications. The library itself supports creating windows, integration with users through an event-based system, support OpenGL graphics, image/video loading support, and playing music. This article discusses installing and using pyglet on Raspberry Pi 3 B+ and Raspberry Pi 4 as a test device.

Key features of pyglet
- No additional external libraries are required.
- Support multi-window and multi-display.
- Image, audio, music and video formats are supported, FFmpeg can be run to play MP3 OGG/Vorbis WMA DivX MPEG-2 H.264 WMV and Xvid files.
- Use BSD (BSD open-source license) code disclosure license.
- Compatible with Python versions 2 and 3.
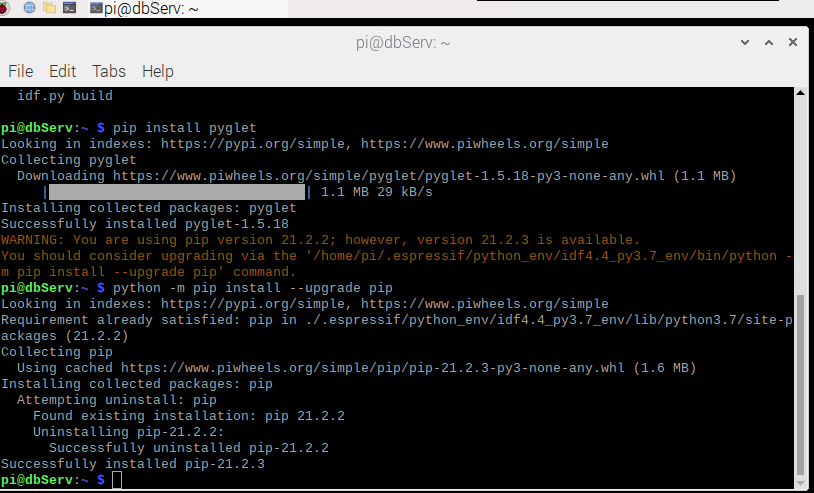
Installing the library is done via pip with the following command. An example of the installation screen is shown in Figure 2.
pip install pyglet
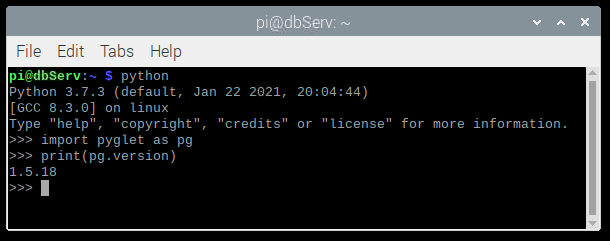
To run the pyglet library, you must run the pyglet library. We have created a new name in pg which writes a set of commands to run the library as follows and can check the model as shown in the example in Figure 3.
import pyglet as pg
Creating window
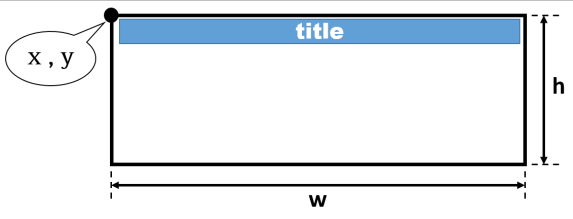
To create a pyglet window, you must call the window class to create an application window as shown in Figure 4. The usage pattern is as follows.
window = pg.window.Window( width = xx, height = xx, caption = “xxx”, resizable = True, visible = True, style = window_style)
where
- width is the width of the window to be created
- height is the height of the window to be created
- caption is the window header text. Also known as title, which is an optional value. And can be defined or changed later with the Change Window Header Text command.
- resizable is to specify whether the created window has properties to be resized or not, where True means that it can be resized and False means that it cannot be resized.
- visible is to configure the created window to appear on the display screen or not, where True means the window appears on the screen after the window has been successfully created and False means to hide the window after the window has been created. User can display the window with set_visible( True ) later.
- style is the form of the window, which has 3 types (as shown in Figures 4, 5 and 6) as follows:
- pg.window.Window.WINDOW_STYLE_DEFAULT
- pg.window.Window.WINDOW_STYLE_DIALOG
- pg.window.Window.WINDOW_STYLE_TOOL
Code
import pyglet as pg
win = pg.window.Window(width=320,height=240,
        caption='Pyglet Ex1-1',
        style=pg.window.Window.WINDOW_STYLE_TOOL)

@win.event
def on_draw():
    win.clear()
if __name__=='__main__':
    pg.app.run()
If you want to create a window in full screen, it can be done according to the above format by defining the properties fullscreen=True to the parameters of the Create Window command. However, programmers can set a window to be a full-screen window or a normal window with the following commands:
window.set_fullscreen( fullscreen = True, scree = None, mode = None, width = None, height = None)
where
- fullscreen if true means change the display mode to full-screen and false if the display in a normal window.
- screen if it is not None and fullscreen is True then the window will move to that screen and use that screen as a full-screen display.
- mode if set to None, the display mode will change the width and height values according to the width and height values.
- width is the width of the display or window.
- height is the height of the display or window.
Creating a multi-display window requires three steps: request a display reference, requests all screen information, and create a window. The following sample code creates a full-screen window on all displays.
display = pg.canvas.get_display()
screen = display.get_screens()
window = []
for variable in screen:
window.append(pg.window.Window(fullscreen = True, screen=variable))
Creating a window with OpenGL properties can be coded as follows:
import pyglet as pg
# 1 prepare config
config  = pg.gl.Config( )
# 2 config setting
config.aux_buffers = 4
config.stereo = 0
config.sample_buffers = 0
config.red_size = 8
config.green_size = 8
config.blue_size = 8
config.alpha_size = 8
config.depth_size = 8
config.stencil_size = 0
config..accum_red_size = 0
config.accum_green_size = 0
config.accum_blue_size = 0
config.accum_alpha_size = 0
config..major_version = 3
config.minor_version = 3
config.forward_compatible = False
config.debug = False
# 3 create window
window = pg.window.Window(config=config)
The command to enable a window to change its status to the top window is as follows:
window.activate( )
The command to clear a window is as follows:
window.clear( )
The command to close a window is as follows:
window.close( )
The command to draw a cursor is as follows:
window.draw_mouse_cursor( )
The command to switch the screen to the buffer in case of creating a double buffer window is as follows: the flip( ) command is executed after the commands the programmer has set in the on_draw event always since pyglet operations are double-buffered, there is no need to execute this command.
window.flip( )
Command to set the current (x,y) coordinates of a window on the display and the command reads the current coordinates of the window on the display. It can be used in the following formats.
window.setlocation(x, y)
(x-axis, y-axis) = window.get_location()
The command to read the width and height of the window and the command to set the size of the window have the following format:
(width, height) = window.get_size()
window.set_size(width, height)
Command for setting the maximum window size, minimum window size and changing the display situation to a large window and a small window. The work order format is as follows:
window.set_maximum_size(width, height)
window.set_minimum_size(with, height)
window.maximize()
window.minimize()
To define a window icon with a 16×16 32×32 image on Windows and 16×16 32×32 64×64 and 128×128 on macOS, the format is as follows.
window.set_icon( *images )
where
can be obtained by loading images from files such as
- icon16x16 = pg.image.load(’16×16.png’)
- icon32x32 = pg.image.load(’32×32.png’)
window.set_icon(icon16x16, icon32x32)
Note
1.The changed icon is not the icon of the application but the icon of the window when the application is running.
2.The .ico file extension is only available on Windows operating systems, so if you are developing a cross-operating application, it’s best to opt for an icon file from a PNG image file as it is an image file that supports transparency.
The command to modify the text in the window header has the following format:
window.set_caption( text )
Command to enable or disable mouse controls. If set to True will prevent the mouse from leaving the boundary of the window, hide cursor display, and can read only the values (dx, dy), which are the changes in the x and y axes when motion occurs.
window.set_exclusive_mouse(exclusive=True)
window.set_exclusive_mouse(exclusive=False)
Commands for turning keyboard controls on or off. If set to True, it prevents users from switching windows to other applications. The command format is as follows.
window.set_exclusive_keyboard( exclusive=True )
window.set_exclusive_keyboard( exclusive=False )
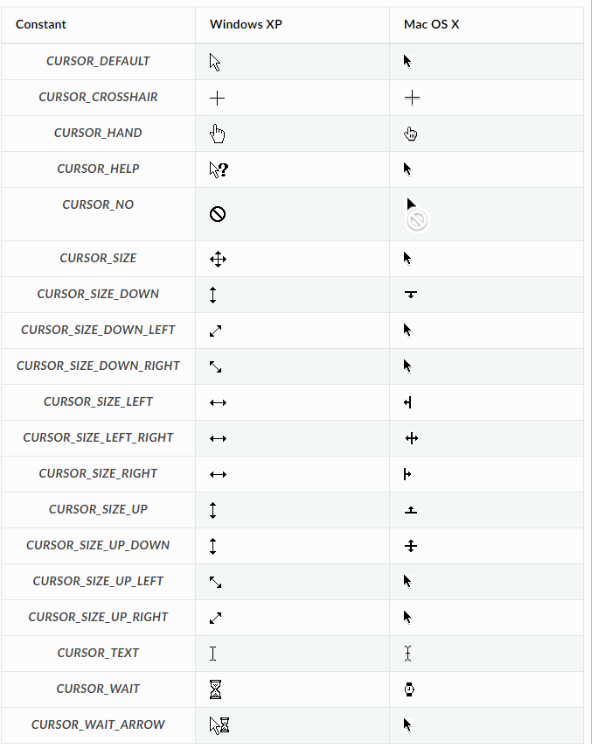
Commands for reading the image of the mouse cursor and set the mouse cursor image with the form of the command as follows.
cursor = window.get_system_cursor( name )
window.set_mouse_cursor(cursor)
where
- name It is the name of the type of cursor to read, which is given in Table 1-1, and the name of the cursor constant/name is as follows.
- CURSOR_DEFAULT= None
- CURSOR_HAND= ‘hand’
- CURSOR_HELP= ‘help’
- CURSOR_NO= ‘no’
- CURSOR_SIZE= ‘size’
- CURSOR_SIZE_DOWN= ‘size_down’
- CURSOR_SIZE_DOWN_LEFT= ‘size_down_left’
- CURSOR_SIZE_DOWN_RIGHT= ‘size_down_right’
- CURSOR_SIZE_LEFT= ‘size_left’
- CURSOR_SIZE_LEFT_RIGHT= ‘size_left_right’
- CURSOR_SIZE_RIGHT= ‘size_right’
- CURSOR_SIZE_UP= ‘size_up’
- CURSOR_SIZE_UP_DOWN= ‘size_up_down’
- CURSOR_SIZE_UP_LEFT= ‘size_up_left’
- CURSOR_SIZE_UP_RIGHT= ‘size_up_right’
- CURSOR_TEXT= ‘text’
- CURSOR_WAIT= ‘wait’
- CURSOR_WAIT_ARROW= ‘wait_arrow’
- cursor is the mouse cursor usually set to None.
The command to hide/show the mouse cursor can be performed with the following commands.
window.set_mouse_visible( visible=False )
window.set_mouse_visible( visible=True )
To hide/show windows, follow these steps:
window.set_visible( visible=False )
window.set_visible( visible=True )
Window property values
The properties or attributes of the window class are as follows:
- caption is the header text Read-only access is available.
- config is a configuration to describe the OpenGL context. Read-only access is available which is a property based on the pg.gl.Config class
- context is an opengl context value. Read-only access is available which is a class-based property pg.gl.Context
- display is the display value. Read-only access is available.
- fullscreen is a window flag. If true, it is displayed in full screen, and if false, it is displayed as a window. Read-only access is available.
- height is the height of the window. Read-only access is available.
- width is the width of the window. Read-only access is available.
- resizable is a window flag, if true means the window can be resized; false means that the window cannot be resized. Read-only access is available.
- screen is window screen value. Read-only access is available.
- style is the window style value. which has the following values
- WINDOW_STYLE_BORDERLESS= ‘borderless’
- WINDOW_STYLE_DEFAULT= None
- WINDOW_STYLE_DIALOG= ‘dialog’
- WINDOW_STYLE_TOOL= ‘tool’
Read-only access is available.
- visible is the window’s appearance. If true, the window is displayed, false, the window is hidden. Read-only access is available.
- vsymc is a V-Sync flag. If true, the window’s display is V-Sync based, and false, the window is not V-Sync-based, is read-only accessible.
(Table 1-1 Mouse cursors in Windows XP and Mac OS X operating systems)
https://pyglet.readthedocs.io/en/stable/programming_guide/mouse.html)
Event
An event is something that happens in the operating system. The programmer is responsible for checking the events that occur in the system to see if any events belong to the program we write. And the incident that we want to respond to or not, as shown in Figure 8.

Intercepting window events
The screen draw event can be intercepted as follows.
@window.event
def on_draw():
commands
To intercept a window’s active event, you can do the following:
@window.event
def on_activate():
commands
To intercept events caused by losing active windows can be done as follows:
@window.event
def on_deactivate():
commands
Intercepting events caused by hiding windows can be done as follows
@window.event
def on_hide():
commands
To intercept events caused by window closing commands can be done as follows:
@window.event
def on_close():
commands
Waiting for window display events (after hiding) can be written as follows:
@window.event
def on_show():
commands
Waiting for a window scroll event can be written as follows
@window.event
def on_move(x, y):
commands
where x, y is the top-left of window
Intercepting the OpenGL context loss event, which resulted in the inability to run OpenGL’s instruction set can be done as follows
@window.event
def on_comtext_lost():
commands
Event intercepting for openGL context state lost when window is moved to another display device or the context changes between full screen and window display or switch from window to full-screen display. Programmers may need to store states, lists, textures, and shaders between the old and new contexts can be done as follows
@window.event
def on_state_context_lost():
commands
Waiting for window resizing events can be written as follows
@window.event
def on_resize(width, height):
commands
where
- width is width of window when resized
- height is heigt of window when resized
To call an application to start, write a set of instructions as follows:
pg.app.run( )
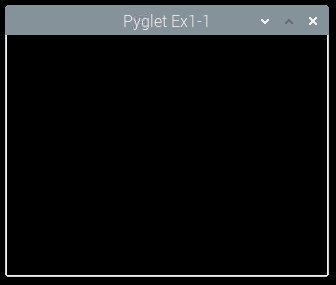
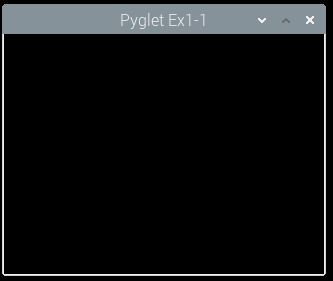
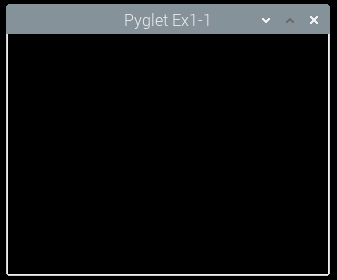
From the format of all the commands mentioned above, it can be written as an example program to create a 800×600 window with the window header text set to Pyglet Ex1-1 and can exit the program by pressing the ESC key. It can be written as in the example program 1-1.
import pyglet as pg
win = pg.window.Window(width=800,height=600, caption='Pyglet Ex1-1')

@win.event
def on_draw():
    win.clear()
if __name__=='__main__':
    pg.app.run()
Intercepting events from the keyboard
The keyboard is the primary input of a computer. The data imported from the keyboard consists of the pressed character data which is called a symbol, and the key state information that is pressed which is called a modifier. The symbol data is the integer data of the ASCII code of the pressed character which has a constant value under the class pg.window.key as follows:
- กลุ่มของตัวอักษร A group of letters are:

- A group of numbers are:

- A group of function keys are:

- A group of control keys are:

- A group of numeric keys (Num Lock) are:

- The modifier data is an integer where each bit indicates the state of a special key pressed. The values are listed in the class pg.window.key as follows:

The sequence of events when a keystroke is pressed and the key is released is composed of three sequences of events: on_key_press( ), on_text(text) or on_text_motion(motion) or on_text_motion_select(motion) and on_key_release( ).
Intercepting keystroke events from users can be written as follows
@window.event
def on_key_press( symbok, modifiers ):
commands
where
- symbol เป็นค่าสัญลักษsymbol is the symbolic value of the key pressed.
- modifiers are the bit values of the shift, ctrl, alt keys pressed along with the symbol.
if modifers & pg.window.key.MOD_SHIFT:
     pass
Intercepting characters pressed by the user which is the event that occurs after on_key_press and before on_key_release can be written as follows.
@window.event
def on_text( text ):
commands
Intercepting characters as the user moves the cursor of the character which is the event that occurs after on_key_press and before on_key_release can be written as follows
@window.event
def on_text_motion(motion):
commands
where
motion is one of the following values under pg.window.key
- MOTION_UP
- MOTION_RIGHT
- MOTION_DOWN
- MOTION_LEFT
- MOTION_NEXT_WORD
- MOTION_PREVIOUS_WORD
- MOTION_BEGINNING_OF_LINE
- MOTION_END_OF_LINE
- MOTION_NEXT_PAGE
- MOTION_PREVIOUS_PAGE
- MOTION_BEGINNING_OF_FILE
- MOTION_END_OF_FILE
- MOTION_BACKSPACE
- MOTION_DELETE
Intercepting a character where the user moves the character’s cursor in a selection event which is the event that occurs after on_key_press and before on_key_release can be written as follows
@window.event
def on_text_motion_select(motion):
commands
where
motion is one of the following values under pg.window.key
- MOTION_UP
- MOTION_RIGHT
- MOTION_DOWN
- MOTION_LEFT
- MOTION_NEXT_WORD
- MOTION_PREVIOUS_WORD
- MOTION_BEGINNING_OF_LINE
- MOTION_END_OF_LINE
- MOTION_NEXT_PAGE
- MOTION_PREVIOUS_PAGE
- MOTION_BEGINNING_OF_FILE
- MOTION_END_OF_FILE
Waiting for keyboard release events from users can be written as follows
@window.event
def on_key_release(symbol, modifiers):
commands
where
- symbol is the symbolic value of the released key.
- modifiers are the bit values of the shift, ctrl, alt keys pressed along with the symbol.
Program example 1-2 creates an 800×600 window and responds to pressing the F key to switch between full-window and normal-window mode. By checking the 14th line, the ord( ) command is used to convert the character to the ASCII value of the character passed as a parameter or change it to if (symbol == pg.window.key.F):
import pyglet as pg

win = pg.window.Window(width=800,height=600)
win.set_caption("PyGlet Ex1-2")
bFullScreen = False

@win.event
def on_draw():
    win.clear()

@win.event
def on_key_press( symbol, modifiers ):
    global bFullScreen
    if (symbol == ord('f')):
        if (bFullScreen):
            bFullScreen = False
        else:
            bFullScreen = True
        win.set_fullscreen( bFullScreen )

if __name__=='__main__':
    pg.app.run()
Intercepting events from mouse movements
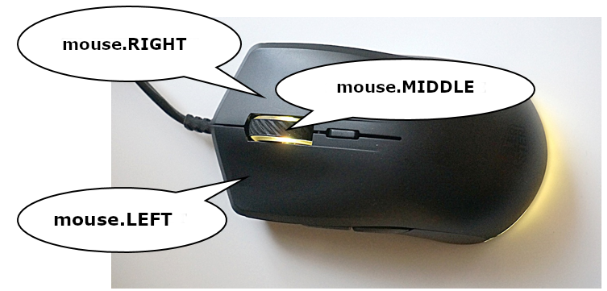
The mouse is an input device by providing the mouse cursor position information as coordinates (x,y) and can check 3 types of mouse button presses (as shown in Figure 9) as follows:
- pg.window.mouse.LEFT
- pg.window.mouse.RIGHT
- pg.window.mouse.MIDDLE
Waiting for mouse drag events can be written as follows
@window.event
def on_mouse_frag(x, y, dx, dy ,buttons, modifiers):
commands
where
- x, y are coordinates away from the top left corner of the screen.
- dx,dy is the direction of motion in the x and y axes.
- buttons is the value of the mouse button pressed.
- modifiers are modifiers that are pressed together with buttons.
Intercepting events where the mouse enters an application window can be written as follows
@window.event
def on_mouse_enter(x, y):
commands
where x, y are the coordinates away from the top left corner of the screen.
Intercepting events where the mouse moves out of an application window can be written as follows
@window.event
def on_mouse_leave(x, y):
commands
Waiting for mouse movement events can be written as follows
@window.event
def on_mouse_motion(x, y, dx, dy,):
commands
where
- x, y coordinates away from the top left corner of the screen.
- dx,dy is the direction of motion in the x and y axes.
Intercepting a mouse click event can be written as follows
@window.event
def on_mouse_press(x, y, buttons, modifiers):
commands
where
- x, y coordinates away from the top left corner of the screen.
- buttons are the values of the mouse button pressed.
- modifiers are the bit values of the shift, ctrl, alt keys pressed along with the buttons.
Waiting for mouse scroll events can be written as follows
@window.event
def on_mouse_scroll(x, y, scroll_x, scroll_y ):
commands
where
- x, y coordinates away from the top left corner of the screen.
- scroll_x, scroll_y are the values of the scroll in the x and y axes.
Waiting for a mouse press release event can be written as follows
@window.event
def on_mouse_release(x, y, buttons, modifiers):
commands
where
- x, y coordinates away from the top left corner of the screen.
- buttons are the values of the mouse button pressed.
- modifiers are the bit values of the shift, ctrl, alt keys pressed along with the buttons.
Program example 1-3 is an example to capture a mouse click event or on_mouse_presss() to change the mouse cursor with a right-click. By creating variable cursors to store various system cursor constants, when the user right-clicks the cursor image data is read in sequence current_cursor, store in the cursor variable with the command get_system_mouse_cursor() and then perform the cursor replacement with the command set_mouse_cursor along with adding the value of current_cursor up by 1, but if it finds a variable current_cursor is greater than the last (stored in variable last_cursor) of the variable will set the value of current_cursor to 0
import pyglet as pg

win = pg.window.Window(width=800,height=600)
win.set_caption("PyGlet Ex1-3")
win.set_mouse_visible(True)
cursors = [win.CURSOR_CROSSHAIR, win.CURSOR_DEFAULT, win.CURSOR_HAND, win.CURSOR_HELP, win.CURSOR_NO, win.CURSOR_SIZE, win.CURSOR_SIZE_DOWN, win.CURSOR_SIZE_DOWN_LEFT, win.CURSOR_SIZE_DOWN_RIGHT, win.CURSOR_SIZE_LEFT, win.CURSOR_SIZE_LEFT_RIGHT, win.CURSOR_SIZE_RIGHT, win.CURSOR_SIZE_UP, win.CURSOR_SIZE_UP_DOWN, win.CURSOR_SIZE_UP_LEFT, win.CURSOR_SIZE_UP_RIGHT, win.CURSOR_TEXT, win.CURSOR_WAIT, win.CURSOR_WAIT_ARROW]
current_cursor = 0
last_cursor = len(cursors)

@win.event
def on_draw():
    win.clear()

@win.event
def on_mouse_press(x,y,buttons,modifers):
    global cursors
    global current_cursor
    global last_cursor
    if (buttons == pg.window.mouse.RIGHT):
        cursor = win.get_system_mouse_cursor(cursors[current_cursor])
        win.set_mouse_cursor(cursor)
        current_cursor = current_cursor + 1
        if current_cursor>=last_cursor:
            current_cursor = 0

if __name__=='__main__':
    print(last_cursor)
    pg.app.run()
Example programs 1-4 create a MyWindow class to inherit class properties pg.window.window. It creates a 640×480 window with Pyglet Ex1-4 header text and turns on mouse and keyboard exclusive mode. Pressing the R key changes the background color to red. It is a combination of RGB color values 1.0, 0.0, 0.0 and 1.0. Pressing the G key changes the background color to green and pressing the B key changes the background color to blue and exit for the user to press the Q key.
import pyglet as pg
from pyglet import gl

class MyWindow(pg.window.Window):
    def __init__(self):
        super(MyWindow, self).__init__()
        self.set_size(640,480)
        self.set_caption("Pyglet Ex1-4")
        self.set_exclusive_mouse(True)
        self.set_exclusive_keyboard(True)

    def on_draw(self):
        self.clear()

    def on_key_press( self, symbol, modifers ):
        if symbol == pg.window.key.Q:
            self.close()
        elif symbol == pg.window.key.R:
            gl.glClearColor(1.0,0.0,0.0,1.0)
        elif symbol == pg.window.key.G:
            gl.glClearColor(0.0,1.0,0.0,1.0)
        elif symbol == pg.window.key.B:
            gl.glClearColor(0.0,0.0,1.0,1.0)

if __name__=='__main__':
    win = MyWindow()
    pg.app.run()
Display text
Displaying text requires the pyglet text class. The format for creating text is as follows.
myText = pg.text.Label( text, x, y, bold = False, italic = False, font_name, font_size, color, anchor_x =’left’, anchor_y = ‘baseline’)
where
- Text is the text string to be created.
- x, y are the positions (x,y) in the window.
- bold is to turn on/off the feature of bold characters, if true means the text is displayed in bold characters, if false, it is normal characters.
- italic is to turn on/off the feature of italic characters. If set to True, it means the generated text is italic, and if false, it means normal characters.
- font_name is the font name of the text, for example, ‘Tahoma’ ‘TH Saraban New’ etc.
- font_size is the size of the font, the unit is pt.
- color is the color of the font. which want to be set as RGBA color values, with each color having a value of 0-255, for example, if you want to set a letter to yellow must be configured as color=(255,255,0,255) and if you want to create green text, you must set the color as follows color=(0,255,0,255), etc.
- anchor_x is a way to arrange text in the X-axis, set to one of the following values ’left’, ‘right’, ‘center’.
- anchor_y is the Y-axis text-truncation method set to one of the following values: ‘baseline’, ‘center’.
If you want to generate data by using HTML tag-based format, you can do this by using the form of command as follows.
myText = pg.text.HTMLLabel( text, x, y, anchor_x, anchor_y)
where
- Text is a text string that needs to be created under the format of an HTML tag such as
‘<font face=”Tahoma” size=”12pt”><B>Hi</B></font>’ - x, y are the positions (x,y) in the window.
- anchor_x is a way to arrange text in the X-axis, set to one of the following values ‘left’, ‘right’, ‘center’.
- anchor_y is the Y-axis text-truncation method set to one of the following values: ‘baseline’, ‘center’.
The display command displays the created text variables on the display. It has the following usage patterns:
myText.draw( )
Example programs 1-5 show the text Hello, World in yellow from a 12-pt Tahoma font in bold, italicized text in the center of the window. And in Examples 1-6, Hello, World is displayed using HTML tags that are similar to Examples 1-5, but the execution of Examples 1-6 is slower than 1-5 because the HTML language has to be decoded as command data.
import pyglet as pg

win = pg.window.Window(width=640,height=480)
win.set_caption("Pyglet Ex1-5")
xCenter = win.width//2
yCenter = win.height//2
text="Hello, World"
txtHello = pg.text.Label(text, font_name="Tahoma", bold=True, italic=True, font_size=12, x=xCenter, y=yCenter, anchor_x='center', anchor_y='center', color=(255,255,0,255))

@win.event
def on_draw():
    win.clear()
    txtHello.draw()

if __name__=='__main__':
    pg.app.run()
Program example 1-6 displays text from HTML tags.
import pyglet as pg

win = pg.window.Window(width=640,height=480)
win.set_caption("Pyglet Ex1-6")


xCenter = win.width//2
yCenter = win.height//2
text="<font face='Tahoma' size=12pt color=#FFFF00><b><i>Hello, World</i></b></font>"
txtHello = pg.text.HTMLLabel(text, x=xCenter, y=yCenter, anchor_x='center', anchor_y='center')

@win.event
def on_draw():
    win.clear()
    txtHello.draw()

if __name__=='__main__':
    pg.app.run()
Display image
Command to load images from image files to store in variables. It has the following usage patterns:
image = pg.image.load( name )
where image name is the name of the image file. The Windows operating system can open file extensions.
- BMP
- DDS
- EXIT
- GIF
- JPG
- JPEG
- PNG
- TIF
- และ TIFF
For the macOS/Linux operating system, the image file type is supported.
- BMP
- DDS
- GIF
- JPG
- JPEG
- JP2
- JPX
- PCX
- PNG
- TGA
- TIF
- TIFF
- XBM
- และ XPM
Image width and height data can be obtained from the property values of image data variables in the following format.
image.width
image.height
The image can be displayed using the following commands:
image.blit( x, y, z )
where
- x, y คือ ตำแหx, y are the coordinates (x,y) in the window used as the image pointer.
- z is the image depth hierarchy.
In case of having to convert image data to use as texture for OpenGL, it can be done by converting the data format as follows.
texture = image.get_texture( )
Here’s an example code for implementing a texture variable:
from pyglet  import  gl
gl.glEnable( texture.target )
gl.glBindTexture( texture.target, texture.id )
Accessing the data within the image data variable requires converting the data to the raw data in the form of the following command.
raw_data = image.get_image_data()
format = ‘RBGA’
pitch = raw_data.width * len(format)
pixel = raw_data.get_data(format, pitch)
The commands to cut part of an image from the position (x,y), width, width, and height can be done in the following format.
crop = image.get_region( x, y, width, height )
Saving image data variables to image files, You can use the command in the following format.
image.save( filename )
Image grid is a technique for loading an image and splitting the loaded image into multiple pieces. This allows developers to prepare multiple images and store them in one large image. This saves time when accessing multiple files because multiple I/O request cycles are not wasted. The format of the grid visualization command is as follows.
grid = pg.image.ImageGrid( image, row, col )
where
- row is the number of rows of the grid image.
- col is the number of columns in a row.
Conclusion
From this article, you will find that PyGlet is a development kit that supports GUI and somewhat better integration with OpenGL than PyGame and is a library that does not require the installation of additional libraries as well as supporting management with the display window, user feedback via keyboard or mouse. It also supports a variety of images as well as being able to display text with fonts from True Type fonts, making it convenient to use. Finally, I hope that this article will be useful to those who are interested in writing GUI on Windows, macOS or Linux operating systems. Finally, have fun with programming.
reference
- pyglet : docs
(C) 2020-2021, By Jarut Busarathid and Danai Jedsadathitikul
Updated 2021-11-21