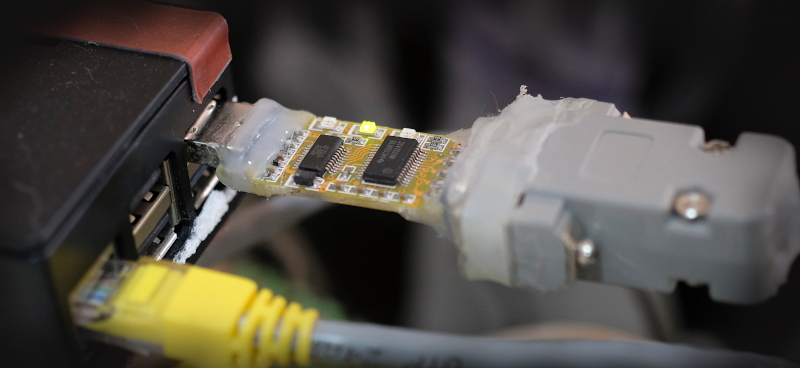
This article discusses the use of Python language pySerial library on Raspberry Pi or RPi both 3rd and 4th generation to connect to the serial port. It can be done in 2 ways, the first is to use hardware like ET-CONV10/RS232 HAT that has been written in the book and with the use of a USB port connected to a converter to be a serial communication port (USB to Serial Port) as shown in Figure 1. This article uses the second method to run pySerial to check how many serial ports are connected and what are their names as an example in Figure 8.
This article consists of 3 parts:
- List the serial ports connected to the RPi with pySerial.
- List the serial ports connected to the RPi with pySerial and PyQt5.
- LEDs on/off via PyQt5 and serial communication.
Check the USB connection
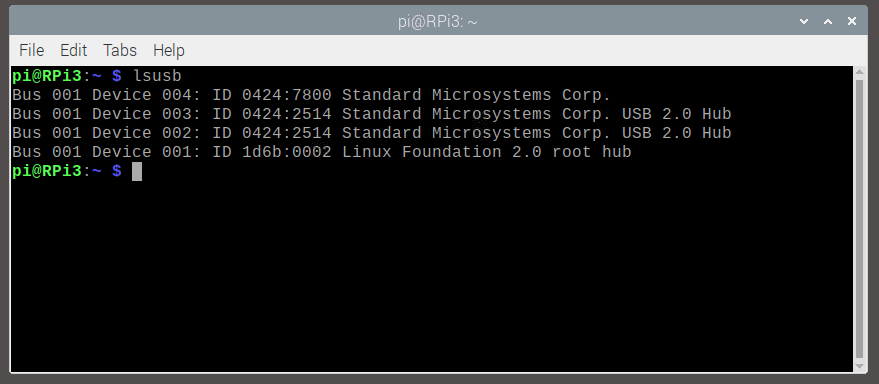
The command for checking which devices are connected to the Raspberry Pi’s USB port has the following format:
lsusb
When running lsusb on a Raspberry Pi without any additional devices connected, the output is shown in Figure 2.
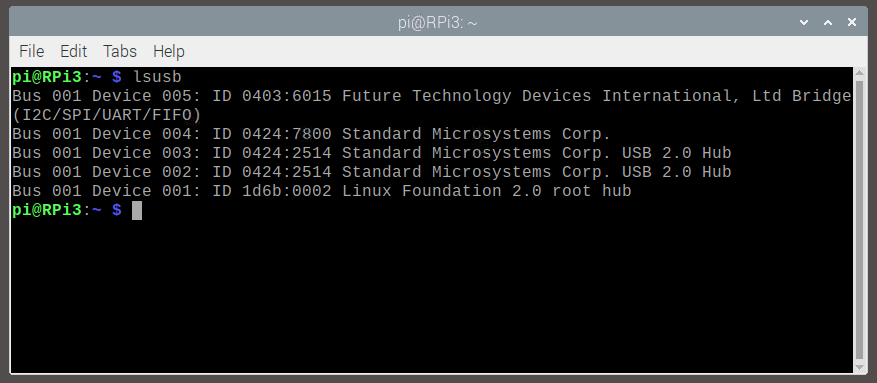
When RS232-to-USB is plugged into the USB port as shown in Figure 1 and use lsusb again will get the result as shown in Figure 3 which lists the connected Device 005 as ID 0403:6015 Future Technology Devices International, Ltd Bridge ( I2C/SPI/UART/FIFO ) which is an RS232-to-USB converter module model ET-USB/RS232 MINI.
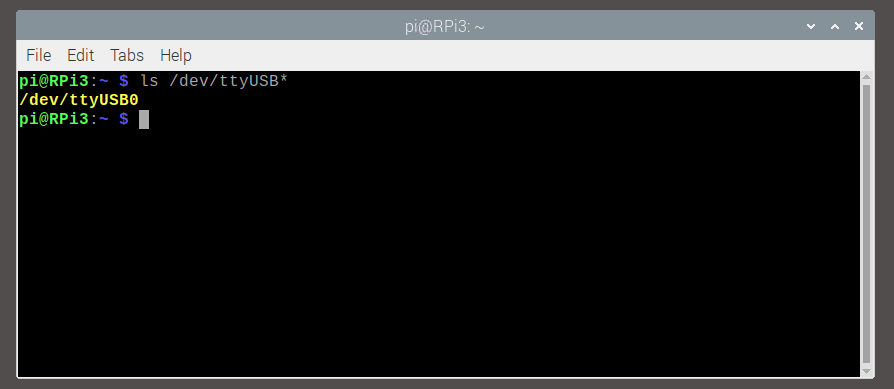
Additionally, when the USB to RS232 converter module is connected to the port, it will get the name of the device as a directory, for example, /dev/ttyUSB0, so when executed with the following command: The result will be as shown in Figures 4 and 5 for the case that the ET-USB/RS232 MINI has not been plugged into the RPi and the result after it has been plugged into the USB port, respectively.
ls /dev/ttyUSB*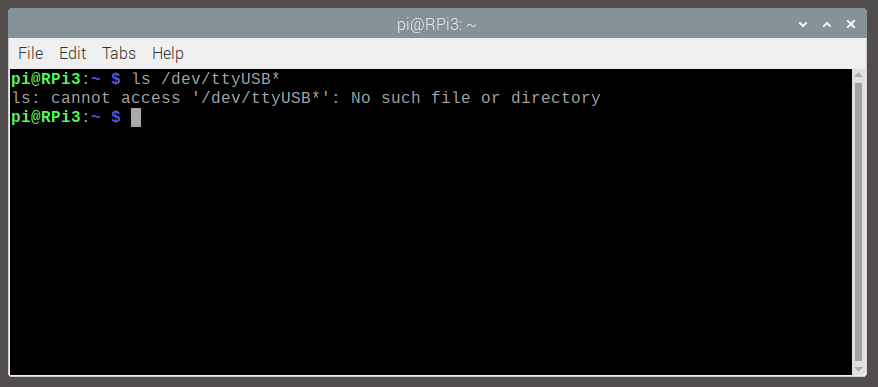
pySerial
The pySerial library is a library for connecting to Python serial ports. This allows serial communication with external devices. The properties of pySerial are as follows.
- Supports all platforms.
- Serial port properties can be set directly from the library commands.
- Supports different byte sizes, bitstop values, using parity bits and operation direction control via RTS/CTS bits and/or Xon/Xoff.
- Can work with or without set timeout period.
- Use the same send and receive commands as the file, read and write.
- Libraries written in Python.
- Compatible with io libraries.
- The port is set to receive and transmit bytes.
Installation
pySerial is usually installed as one of the core libraries of Python version 3, so it doesn’t need to be installed. But you can install pySerial via pip in the following format:
pip install pyserial
If you want to install the upgraded library to a newer version, use the following command instead of the command above.
pip install –upgrade pyserial
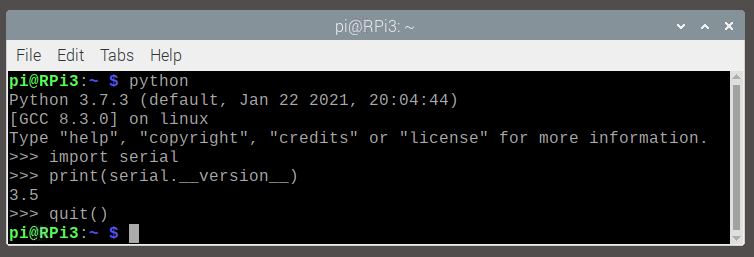
After the installation is complete or upgrade to a newer version, check the functionality by running the python program and importing serial to show the library version as shown in Figure 6.
Creating a serial communication object
To use the pySerial library, one must create a serial communication object:
obj = serial.Serial(port=None, baudrate=9600, bytesize=EIGHTBITS, parity=PARITY_NONE, stopbits=STOPBITS_ONE, timeout=None, xonxoff=False, rtscts=False, write_timeout=None, dsrdtr=False )where
- port is the name of the port to be connected. They have different names depending on the operating system, for example, /dev/ttyUSB0 for Linux or COM4 on Windows.
- baudrate is the communication rate in bps (bits-per-second), which can be set as follows:
- 50
- 75
- 110
- 134
- 150
- 200
- 300
- 600
- 1200
- 1800
- 2400
- 4800
- 9600
- 19200
- 38400
- 57600
- 115200
- 230400
- 460800
- 500000
- 576000
- 921600
- 1000000
- 1152000
- 1500000
- 2000000
- 2500000
- 3000000
- 3500000
- 4000000
- bytesize is the size of the data which has the following values:
- FIVEBITS
- SIXBITS
- SEVENBITS
- EIGHTBITS
- parity is to enable traffic verification using parity bits which can be configured as follows:
- PARITY_NONE
- PARITY_EVEN
- PARITY_ODD
- PARITY_MARK
- PARITY_SPACE
- stopbits is the number of bits used for the termination bit which has the following values:
- STOPBITS_ONE
- STOPBITS_ONE_POINT_FIVE
- STOPBITS_TWO
- timeout is a decimal numeric value that is the time unit of the timeout detection of the communication port reading. There are three types of values:
- None wait until the data is entered.
- 0 for non-blocking or not having to wait until data is available. That means that if the information is found, it cannot be read, so skip it and don’t wait.
- X for wait until the data is found for X seconds.
- xonxoff is to enable or disable software traffic control.
- rtscts is to enable or disable hardware traffic control via RTS/CTS pin for data transmission.
- dsrdtr is to enable or disable hardware traffic control via DSRDTR pin for receiving data.
- write_timeout is to configure the timeout in case of sending data which normally works like none-blocking or finished delivery, no need to wait.
The exception values are as follows:
- ValueError the given parameter has an invalid value.
- SerialException if the specified device is not found in the port
Port opening
Opening the port of the created object can be used in the following commands.
obj.open()
Close connection
The case of disabling communication when not in use or holding the port, run the command in the following format.
obj.close()
Status checking
To check if the created port is enabled first, you can use the check command as follows.
result = obj.isOpen()
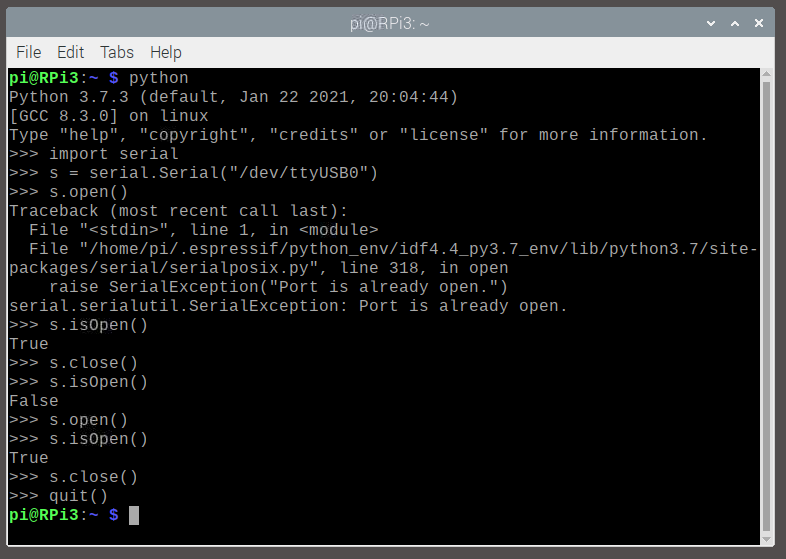
An example of creating, opening, closing, and checking the status is as shown in Figure 7, which shows that after creating an object, it will cause the connection to be opened immediately. When repeating open() commands, an error will occur.
Data seding
คำThe command for exporting data has the following format:
obj.write( data )
If you want to remove all data from the buffer so that the buffer is empty, use the following command:
obj.flushOutput()
Data receiving
The input can be done by the command in the following format.
data = obj.read()
data = obj.read( byte )
If you want to clear the value of the import buffer, use the following command.
obj.flushInput()
You can check the wait for data acquisition by using the inWaiting() command as follows:
number_of_data = obj.inWaiting()
Example Code
The algorithm of the sample program is as follows.
- create object
- names the port to object
- open the port
- if error, port does not exist
- if ok, port is ok
- close the port
- If all names are not complete, change the name and go back to step 3.
The following example program lists the serial ports connected to the Raspberry Pi board via the USB port, and the resulting example program is shown in Figure 8.
import serial
s = serial.Serial()
portNames = [
    "/dev/ttyUSB0",
    "/dev/ttyUSB1",
    "/dev/ttyUSB2",
    "/dev/ttyUSB3",
    "/dev/ttyACM0",
    "/dev/ttyACM1",
    "/dev/ttyACM2",
    "/dev/ttyACM3"
]
for pname in portNames:
    try:
        s.port = pname
        s.open()
        if s.isOpen():
            print("Found {}.".format(pname))
    except:
        pass
print("End of program.")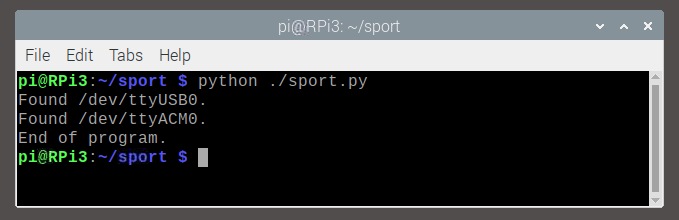
Conclusion
In this article, you can find out which communication ports are used to connect the device to the Raspberry Pi board by specifying the port name. When a port is enabled, an error indicates that the port is not connected. With this principle, it was converted to programming examples. You will also find that if you want to use this program with other operating systems, such as Microsoft Windows or Apple macOS, you will need to change the name of the port to search accordingly:
- Windows start with COM
- Linux start with /dev/ttyUSB และ /dev/ttyACM
- macOS start with /dev/cu.
Finally, We hope this article is more or less helpful and have fun with programming.
References
- PyPi : pyserial
- pythonhost.org: Welcome to pySerial’s documentation.
(C) 2020-2021, By Jarut Busarathid and Danai Jedsadathitikul
Updated 2022-01-06