บทความนี้แนะนำบอร์ดไมโครคอนโทรลเลอร์ที่ใช้ชิพ ATSAMD21G18 ของบริษัท Microchip ที่ใช้สถาปัตยกรรม ARM แบบ 32 บิต แกนตระกูล Cortex-M0+ ในรูปแบบบอร์ดตามตระกูล Arduino Uno ดังภาพที่ 1
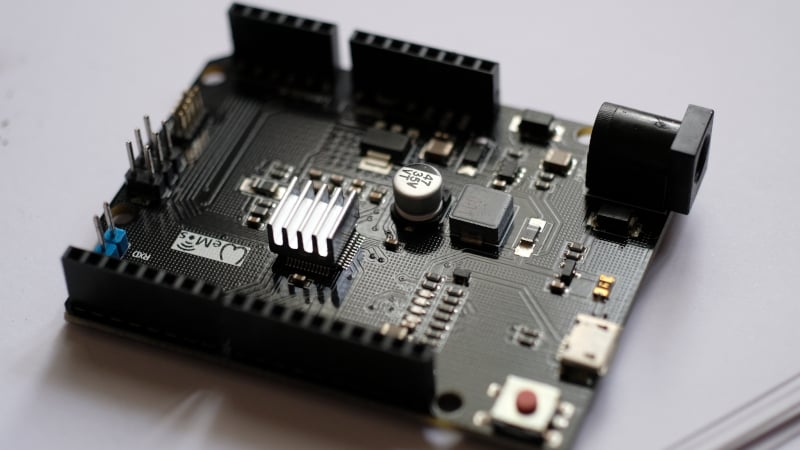
บทความนี้แนะนำบอร์ดไมโครคอนโทรลเลอร์ที่ใช้ชิพ ATSAMD21G18 ของบริษัท Microchip ที่ใช้สถาปัตยกรรม ARM แบบ 32 บิต แกนตระกูล Cortex-M0+ ในรูปแบบบอร์ดตามตระกูล Arduino Uno ดังภาพที่ 1
This article discusses the SPI bus functionality of the Arduino framework for use with the STM32F030F4P6, STM32F103C8, STM32F401, esp8266 and esp32. The operation of this bus requires at least 3 intercommunication cables: SCLK, MISO. and MOSI for transmitting the clock signal between the sender and the receiver. It serves to receive information from the sender. and used for sending information to the recipient.
From the use of 3 signal lines, it is found that data can be transmitted and received simultaneously. This is different from I2C bus communication that uses only one SDA cable to communicate. At the same communication speed, the SPI bus will receive and transmit data without waiting for an idle line, while I2C will have to wait for idle. With this in mind, SPI can send/receive data faster.
In addition, SPI uses a method to select the destination to communicate by instructing the endpoint to know by sending a signal to the SS pin of the terminal. Therefore, when connecting to multiple devices, SPI requires a larger number of pins to operate, while I2C uses device identification to communicate with each other by still using only one SDA cable, which saves more pins.

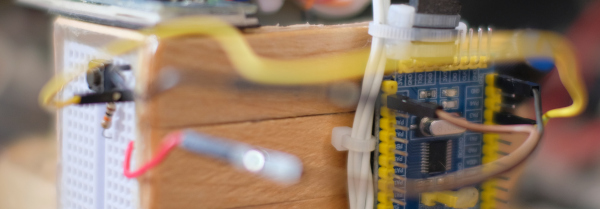
From the previous article, we have experimented with controlling the digital signal output by driving the LED circuit connected to the STM32 microcontroller board, both Cortex-M0, Cortex-M3 and Cortex-M4. to import digital signals and use an example of connecting a switch circuit to control the on or off of an LED lamp as shown in Figure 1.
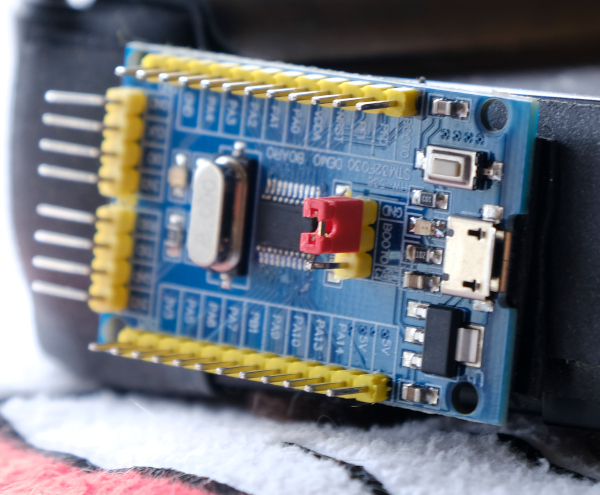
From the previous article, we have tried writing a program to study the elements of various files that we need, we found that there are quite a lot of details and steps. But it is an important basis for those who want to seriously and usefully study Cortex-M0 programming via STM32F030F4P6 (Figure 1), Cortex-M3 with STM32F103C (Figure 32) and Cortex-M4 with STM32F401CCU6 (Figure 27) to study of programming structure with programming tool STM32CubeIDE (Figure 2), which is the main tool used in this series of articles. This is because it combines ST’s complete development kit for ARM, including CubeMX for chip design, compiler toolkit, ST-Link program debugging tool and code editor in one tool, plus it supports both Windows, Linux and macOS operating systems.

This article is a series of programming articles focused on the Cortex-M0 via the STM32F030F4P6 or any other STM32 microcontroller based on CMSIS, an ARM firmware compiled from vivonomicon.com‘s series of Bare Metal: STM32 Programming articles without using the Arduino framework. In the article EP.1 is a matter of preparation. It consists of creating a link file to link different parts of the code together and the working part file. After that, the result file is uploaded into the microcontroller to complete the program development process.
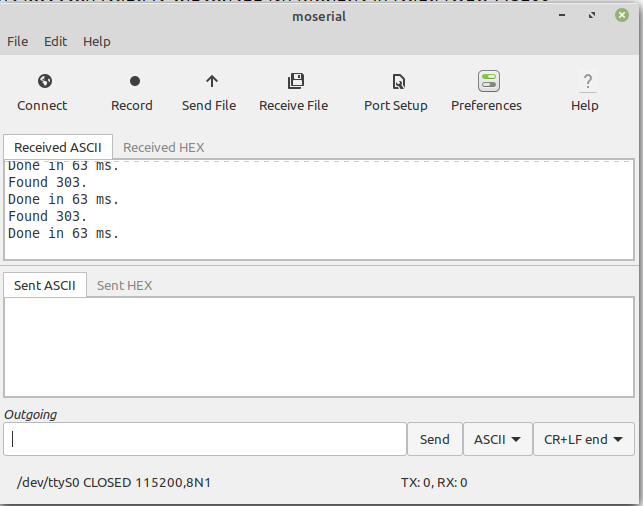
บทความนี้กล่าวถึงการใช้งานพอร์ตสื่อสารอนุกรม UART ซึ่งนิยมใช้มานาน และสะดวกต่อการใช้งาน โดยใช้ขา PA9 และ PA10 ต่อเข้าเป็นขา Tx และ Rx ของไมโครคอนโทรลเลอร์ทั้ง cortex-M0/M3/M4 เชื่อมต่อกับขา Rx/Tx ของตัวแปลงระดับแรงดันสัญญาณสำหรับสื่อสารผ่านทางพอร์ต USB ซึ่งตัวอย่างโปรแกรมเป็นการประมวลผลในไมโครคอนโทรลเลอร์และนำออกผลลัพธ์ผ่านทางพอร์ตสื่อสารอนุกรมที่ใช้งานโปรแกรม moserial เป็นซอฟต์แวร์สื่อสารข้อมูลดังภาพที่ 1
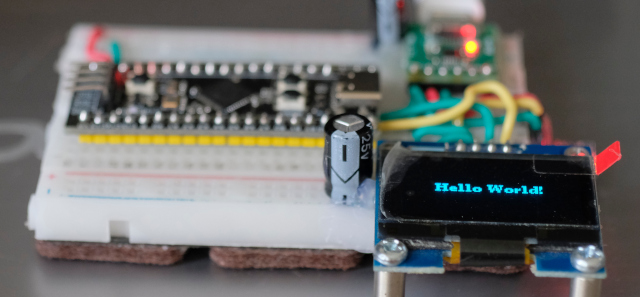
จากบทความการใช้ ESP8266 กับจอแสดงผลกราฟิกแบบ OLED ซึ่งเขียนด้วยภาษาไพธอนจะพบว่าการทำงานนั้นสะดวกรวดเร็วในระดับดี แต่เมื่อต้องใช้กับไมโครคอนโทรลเลอร์ตัวอื่นที่ไม่สามารถใช้ Micropython หรือ CircuitPython ได้นั้นจะต้องทำอย่างไร ซึ่งหนึ่งในหลายทางเลือกคือไลบรารี u8glib หรือ u8g2 (Universal 8 bit Graphics Library) ที่ออกแบบมาเพื่อทำงานกับกราฟิกแบบ 8 บิตแบบโมโนโครมทั้งผ่านการสื่อสารแบบ I2C หรือ SPI โดยบทความนี้ใช้อุปกรณ์ต่อเชื่อมกันดังภาพที่ 1 ด้วยการใช้ OLED แบบ I2C
บทความนี้กล่าวถึงฟังก์ชันการใช้งานของบัส SPI ของเฟรมเวิร์ก Arduino เพื่อใช้กับ STM32F030F4P6, STM32F103C8, STM32F401, esp8266 และ esp32 ซึ่งการทำงานของบัสนี้ต้องการสายสัญญาณสำหรับสื่อสารระหว่างกันอย่างน้อย 3 เส้น คือ SCLK, MISO และ MOSI สำหรับทำหน้าที่ส่งสัญญาณนาฬิการะหว่างกันของผู้ส่งและผู้รับ ทำหน้าที่รับข้อมูลจากผู้ส่ง และใช้สำหรับส่งข้อมูลไปให้ผู้รับ
จากการใช้สายสัญญาณ 3 เส้นจะพบว่า สามารถส่งและรับข้อมูลพร้อมกันได้ ซึ่งแตกต่างกับการสื่อสารแบบบัส I2C ที่ใช้สาย SDA เพียงเส้นเดียวในการสื่อสาร ดังนั้น อาจจะกล่าวได้ว่า ด้วยความเร็วในการสื่อสารที่เท่ากัน บัสแบบ SPI จะรับและส่งข้อมูลได้โดยไม่ต้องรอสายสัญญาณว่าง ขณะที่ I2C จะต้องรอให้ว่างก่อน ด้วยหลักคิดนี้จึงทำให้ SPI รับ/ส่งข้อมูลได้รวดเร็วกว่า
นอกจากนี้ SPI ใช้วิธีการเลือกปลายทางที่ต้องการสื่อสารด้วยการสั่งให้ปลายทางรู้ด้วยการส่งสัญญาณไปที่ขา SS ของอุปกรณ์ปลายทาง ดังนั้น เมื่อเชื่อมต่อกับหลายอุปกรณ์จึงส่งผลให้ SPI ต้องการจำนวนขาในการทำงานที่มากกว่า ขณะที่ I2C ใช้การระบุคำแหย่งของอุปกรณ์ในการสื่อสารระหว่างกัน โดยยังคงใช้สาย SDA เพียงเส้นเดียวทำให้ประหยัดขาได้มากกว่า
หลังจากได้ใช้คำสั่ง HAL สำหรับสั่งงาน Cortex-M0/M3/M4 ไปกันพอสมควร ครั้งนี้มาประยุกต์เพื่อขับเคลื่อนหุ่นยนต์รถ 2 ล้อให้เดินหน้า ถอยหลัง หันซ้าย หันขวา และหยุดกันบ้าง ดังนั้น ในบทความนี้กล่าวถึงการประยุกต์ใช้ GPIO เพื่อส่งสัญญาณ 0 หรือ 1 ไปยังพอร์ตที่ต่อกับภาคขับมอเตอร์ดังภาพที่ 1 เพื่อให้ตัวหุ่นนั้นเคลื่อนที่

จากบทความก่อนหน้านี้ได้ทดลองควบคุมการนำออกสัญญาณดิจิทัลด้วยการขับวงจรแอลอีดีที่เชื่อมต่อกับบอร์ดไมโครคอนโทรลเลอร์ STM32 ทั้งแบบ Cortex-M0, Cortex-M3 และ Cortex-M4 ในบทความนี้กล่าวถึงการใช้งานขาเพื่อนำเข้าสัญญาณดิจิทัล และใช้ตัวอย่างการต่อวงจรสวิตช์เพื่อควบคุมการติดหรือดับของหลอดแอลอีดีดังภาพที่ 1