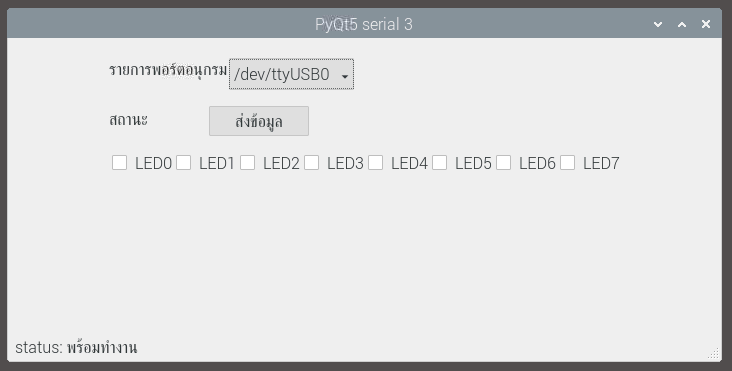
ในบทความนี้ใช้ความรู้จากบทความการอ่านรายชื่อพอร์ตอนุกรมที่ถูกเชื่อมต่อมาปรับปรุงให้เป็นการส่งข้อมูลส่งไปให้บอร์ด Arduino Uno ที่มีหลอดแอลอีดี (LED) เชื่อมต่ออยู่ที่ขา 2,3,4,5,6,7,8 และ 9 ทำให้ผู้ใช้งานสามารถสั่งเปิดหรือปิดหลอดดังกล่าวด้วยการสั่งงานผ่าน GUI (Graphics User Interface) ของ PyQt5 ดังภาพที่ 1 และส่งข้อมูลไปให้บอร์ด Uno ทางพอร์ตสื่อสารอนุกรมด้วย pySerial โดยในตัวอย่างครั้งนี้ การทำงานรองรับทั้งระบบปฏิบัติการ Windows, macOS และ Linux ซึ่งจะทำให้เห็นว่า PyQt5 และ pySerial สามารถรองรการทำงานกับทั้ง 3 ระบบได้
Category: Raspberry Pi
[TH] List the serial ports connected to the RPi with pySerial and PyQt5.
จากบทความก่อหน้านี้เราได้อ่านรายชื่ออุปกรณ์ที่เชื่อมต่อกับพอร์ตอนุกรมของบอร์ด Raspberry Pi หรือ RPi ด้วยไลบรารี pySerial ดังภาพที่ 1 ในแบบโหมดตัวอักษรไปแล้ว ในบทความนี้เป็นการผนวกหลักการทำงานจากก่อนหน้าเข้ากับการใช้ส่วนติดต่อกับผู้ใช้แบบกราฟิกส์ หรือ GUI (Graphics User Interface) ผ่านทางไลบรารี PyQt5 โดยแสดงรายการเอาไว้ใน combobox เพื่อให้ผู้ใช้งานเลือกใช้งานได้ แต่ถ้าไม่พบพอร์ตสื่อสารอนุกรมที่เชื่อมต่อกับบอร์ด RPi จะปิดการใช้งานของ combobox ไม่ให้ผู้ใช้งานเลือกใช้งาน ดังนั้น บทความนี้จึงมีเนื้อหาเกี่ยวกับการประยุกต์ใช้ pySerial กับการใช้งานของ QLabel และ QComboBox ในไลบรารี PyQt5
[TH] List the serial ports connected to the RPi with pySerial.
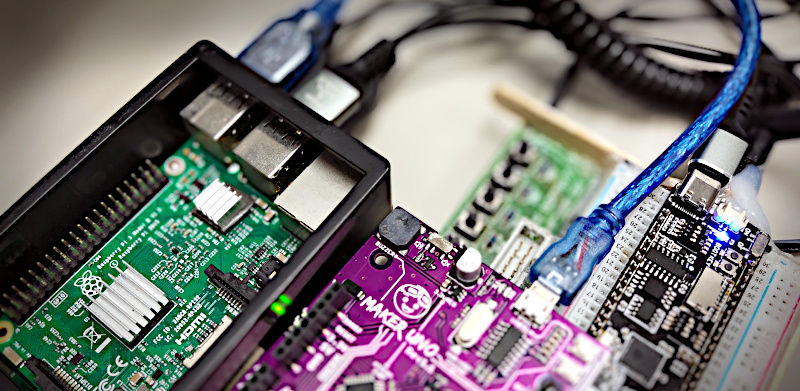
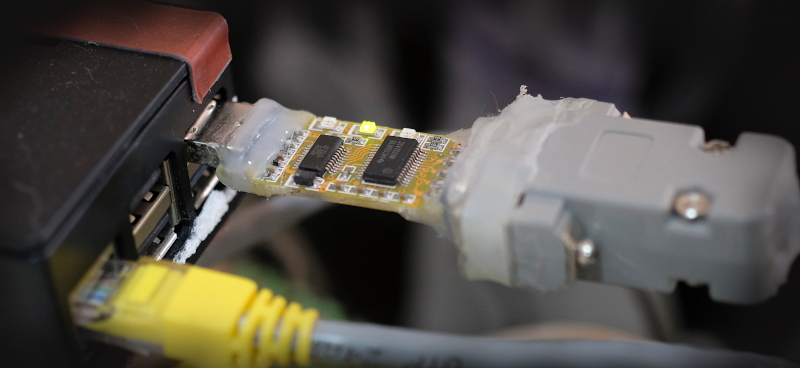
บทความนี้กล่าวถึงการใช้ไลบรารี pySerial ของภาษาไพธอนบนบอร์ด Raspberry Pi หรือ RPi ทั้งรุ่น 3 และ 4 เพื่อเชื่อมต่อกับพอร์ตสื่อสารอนุกรม (Serial Port) ซึ่งตัวบอร์ดสามารถทำได้ 2 ลักษณะคือ ใช้ฮาร์ดแวร์อย่าง ET-CONV10/RS232 HAT ที่ได้เขียนถึงในหนังสือ กับการใช้พอร์ต USB เชื่อมต่อกับตัวแปลงเป็นพอร์ตสื่อสารอนุกรม (USB to Serial Port) ดังภาพที่ 1 โดยบทความนี้เป็นการใช้แบบที่ 2 เพื่อเรียกใช้ pySerial สำหรับตรวจสอบว่ามีพอร์ตอนุกรมเชื่อมต่ออยู่กี่พอร์ตและชื่ออะไรบ้าง ดังตัวอย่างในภาพที่ 8
[EN] PyOpenGL
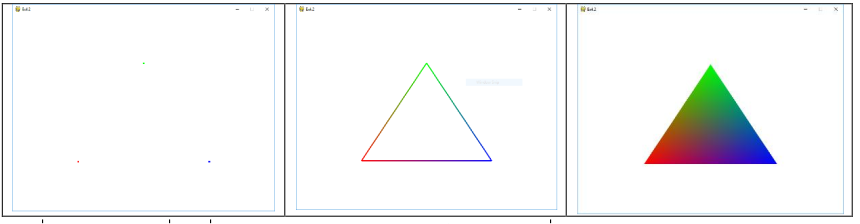
This article uses the Python programming language of the Raspberry Pi board with OpenGL to render a 3D image of a rectangular box rotated towards the X, Y and Z axes.
[EN] PyQt5
This article provides an example of opening a window and using a button in response to PyQt5, which is the basis for using the other components. The highlight of Qt is that it is a cross-platform C++ development kit and covers the integration for compatibility with languages such as PyQt, “The python binding for the Qt cross-platform C++ framework” developed by Riverbank Computing Limited, currently released in PyQt 6.1.1 (2021-06-29).

[EN] ESP-IDF Ep.1: ESP-IDF on Raspberry Pi
This article is a step-by-step guide to installing ESP-IDF on a Raspberry Pi 3 or 4 board with the Raspbian operating system (Or can be applied to other operating systems with AMD/Intel processors) to be used as a C++ interpreter for developing programs for the ESP32 board, which is called bare metal or used to compile MicroPython, in particular mpy-cross, a translator from Python (.py) to bytecode (.mpy), which protects source code, allowing faster execution of instructions. (because it has been translated before) and the file size is smaller.

[EN] Node.js&Phaser.js
This article discusses installing Phaser.js as a game framework and using Node.js as a web resource provider for the Raspberry pi 4, enabling the board to be the web server for games we’ve developed. The article discusses the creation of a project, installing libraries, master coding and running the service machine to allow the client to run the game through the browser.
Read More[EN] Node.js on Raspberry Pi
This article is an installation note to run Node.js on a Raspberry Pi 4 on Ubuntu Linux 20.10 as a system for further use.
Read More[EN] VisionRobo Car: Drive Motor
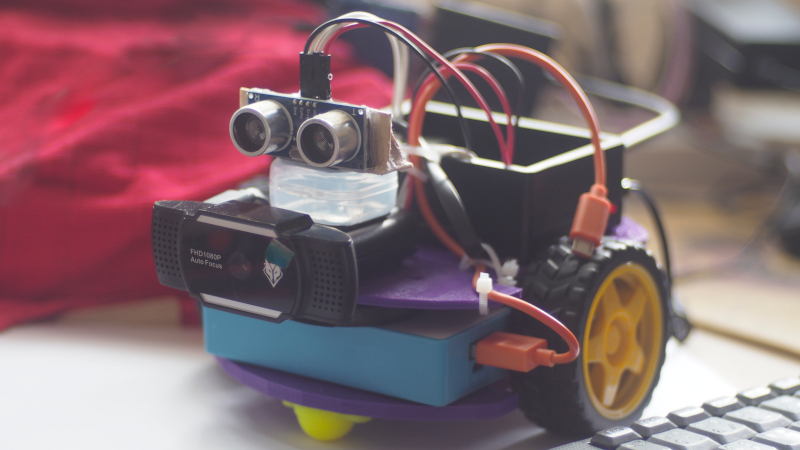
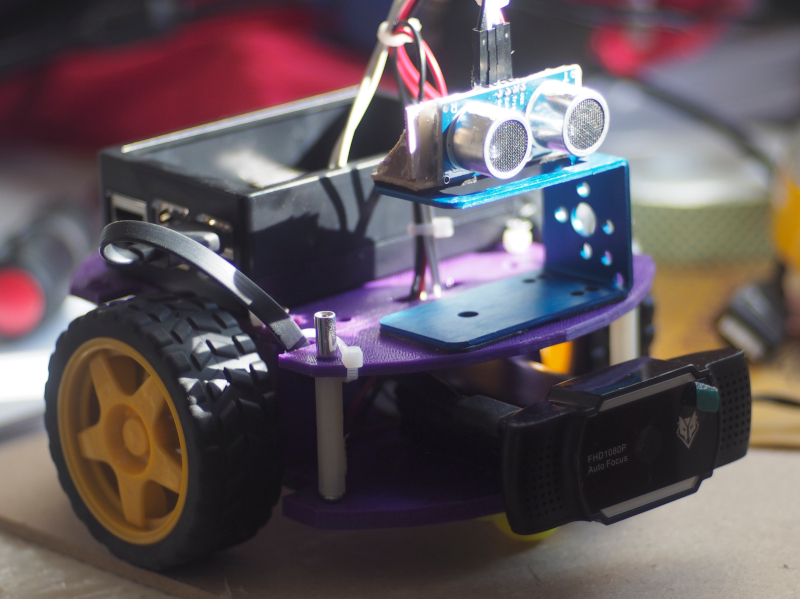
This article is programming in Python to drive a robot moving with wheels. VisionRobo car is a robot kit that is equipped with a DC motor that is attached to a wheels gear set. It uses a circuit to drive a DC motor connected to Raspberry Pi Board and connect a USB WebCamera Module and Ultrasonic Sensor Module for image processing and calculate the distance of the robot to the surrounding objects.
[EN] Raspberry Pi & Ultrasonic Sensor
This article discusses how to use an ultrasonic module with a Raspberry Pi board (the previous article applies to the ESP8266) in Python to show the distance from the sensor to the closest object found.