[EN] Arduino: STM32F103CBT6 ADC&LDR.

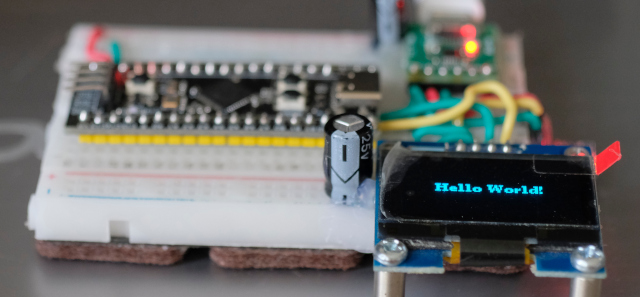
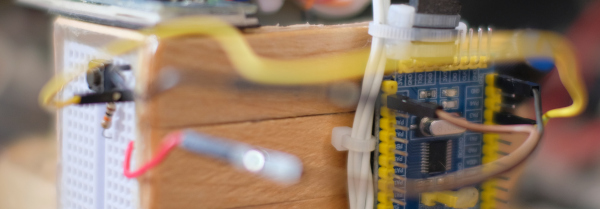
From reading articles on how to use board STM32L432 ADC and articles about STM32F103x connecting to ST7735S, it’s time to take STM32F103CBT6 or Blue-Pill/Black-Pill board. Let’s write a program to use ADC to display on a TFT screen. The example of the result of this article is as shown in Figure 1, which is reading from Pin PA0 that has been connected to Pin Analog signal from Board LDR in Figure 2 to Displayed on a TFT display.

Figure 1 Our board’s operation
Read More

[EN] Arduino: ESP32-S2’s DAC&ADC.

After testing the DAC and ADC of both the ESP32, SAM-D21, LGT8F328P and STM32L432KC, This time, it’s the time of the ESP32-S2 that we have. The test performance is still the same as before using the DAC. Three types of waves are sent out: zigzag, triangular, and sine waves and connect to the ADC pin to read the value and test the graph to see what it looks like.

In this experiment, DAC1 is connected to the ADC as shown in Figure 1. The ESP32-S2 has 2 ports of 8-bit DAC called DAC1 and DAC2. The ADC has a 12-bit resolution, which is seen to have the same properties as the ESP32, but whether the results are the same or not, you can tell that they are probably different because they use different microcontrollers. The ESP32-S2 uses the same one as the ESP32-S3 with only one core and no BLE.

Figure 1 Neucleo L432KC with A3 connected to D3
Read More

[EN] Arduino: STM32L432 Nucleo-32’s DAC&ADC.

From reading the article Using STM32 Core Support for Arduino for Board Nucleo L432KC by Ajarn Rewat Siriphokapirom, we have provided the board to test and connect the pin for sending data output DAC to ADC as shown in Figure 1 to test the operation of the DAC and ADC of the board by using the working code like the ESP32 microcontroller board, SAM-D21 and LGT8F328P. Let’s get started.

Figure 1 Neucleo L432KC with A3 connected to D3
Read More

[TH] Arduino: STM32F103CBT6 ADC&LDR.

จากที่ได้อ่านบทความการใช้ ADC ของบอร์ด STM32L432 และบทความเกี่ยวกับ STM32F103x ในการเชื่อมต่อกับ ST7735S เลยถึงคราวนำ STM32F103CBT6 หรือบอร์ด Blue-Pill/Black-Pill มาเขียนโปรแกรมใช้งาน ADC เพื่อแสดงผลบนจอ TFT กันบ้าง โดยตัวอย่างผลลัพธ์ของบทความนี้เป็นดังภาพที่ 1 อันเป็นการอ่านค่าจากขา PA0 ที่ได้เชื่อมต่อกับขาสัญญาณแอนาล็อกจากบอร์ด LDR ในภาพที่ 2 เพื่อแสดงผลบนจอแสดงผลแบบ TFT

ภาพที่ 1 ตัวอย่างการทำงานของโปรแกรมในบททความ
Read More

[TH] Arduino: ESP32-S2’s DAC&ADC.

หลังจากที่ทดสอบ DAC และ ADC ของทั้ง ESP32, SAM-D21, LGT8F328P และ STM32L432KC เป็นที่เรียบร้อย ครั้งนี้ก็เป็นคราวของ ESP32-S2 ที่ทางเรามีใช้งานอยู่ โดยการทดสอบการทำงานยังคงเป็นเหมือนก่อนหน้านี้ที่ใช้ DAC ส่งคลื่น 3 ลักษณะคือ ฟันปลา สามเหลี่ยม และคลื่นรูปไซน์ออกมา และเขื่อมต่อเข้ากับขาของ ADC เพื่อนอ่านค่า พร้อมทั้งทดสอบดูกราฟว่ามีลักษณะออกมาเป็นอย่างไร

ในการทดลองนี้ได้เชื่อมต่อ DAC1 เข้ากับ ADC ดังภาพที่ 1 โดย ESP32-S2 มี DAC ขนาด 8 บิตจำนวน 2 พอร์ตเรียกว่า DAC1 และ DAC2 ส่วน ADC มีความละเอียด 12 บิต ซึ่งจะเห็นว่ามีคุณสมบัติเหมือนกับ ESP32 แต่จะได้ผลลัพธ์เหมือนกันหรือไม่นั้นคงบอกได้ว่าน่าจะแตกต่างเนื่องจากใช้ไมโครคอนโทรลเลอร์คนละรุ่นกัน โดยใน ESP32-S2 ใช้ตัวเดียวกับ ESP32-S3 ที่มีเพียงแกนเดียว และไม่มี BLE

ภาพที่ 1 บอร์ด Neucleo L432KC เชื่อมต่อขา A3 เข้ากับ D3
Read More

[TH] Arduino: STM32L432 Nucleo-32’s DAC&ADC.

จากที่ได้อ่านบทความ การใช้งาน STM32 Core Support for Arduino สำหรับบอร์ด Nucleo L432KC ของอาจารย์ เรวัต ศิริโภคาภิรมย์ ทางเราเลยได้จัดหาบอร์ดมาทดลองใช้งานและเชื่อมต่อขาสำหรับส่งข้อมูลออก DAC ไปยัง ADC ตามภาพที่ 1 เพื่อทดสอบการทำงานของภาค DAC และ ADC ของบอร์ดโดยใช้โค้ดการทำงานเหมือนกับบอร์ดไมโครคอนโทรลเลอร์ ESP32, SAM-D21 และ LGT8F328P ว่าเป็นอย่างไร มาติดตามกันครับ

ภาพที่ 1 บอร์ด Neucleo L432KC เชื่อมต่อขา A3 เข้ากับ D3
Read More

[EN] u8g2 Library

From the article on using the ESP8266 with an OLED graphical display written in Python, you’ll find that it’s fast and easy but when used with other microcontrollers that cannot use Micropython or CircuitPython, what must be done? One of the many options is the u8glib or u8g2 (Universal 8 bit Graphics Library) libraries, designed to work with monochromatic 8-bit graphics over either I2C or SPI communication. In this article, we are using I2C OLED as shown in Figure 1.

(Figure. 1 STM32F401CCU6 with I2C OLED)
Read More

[EN] Bare Metal Cortex-M Ep.3

From the previous article, we have experimented with controlling the digital signal output by driving the LED circuit connected to the STM32 microcontroller board, both Cortex-M0, Cortex-M3 and Cortex-M4. to import digital signals and use an example of connecting a switch circuit to control the on or off of an LED lamp as shown in Figure 1.

(Figure. 1 Our board in this article)
Read More

[EN] Bare Metal Cortex-M Ep.2

From the previous article, we have tried writing a program to study the elements of various files that we need, we found that there are quite a lot of details and steps. But it is an important basis for those who want to seriously and usefully study Cortex-M0 programming via STM32F030F4P6 (Figure 1), Cortex-M3 with STM32F103C (Figure 32) and Cortex-M4 with STM32F401CCU6 (Figure 27) to study of programming structure with programming tool STM32CubeIDE (Figure 2), which is the main tool used in this series of articles. This is because it combines ST’s complete development kit for ARM, including CubeMX for chip design, compiler toolkit, ST-Link program debugging tool and code editor in one tool,  plus it supports both Windows, Linux and macOS operating systems.

(Figure. 1 STM32F030F4P6 and USB–RS232 )
Read More

[TH] u8g2 Library

จากบทความการใช้ ESP8266 กับจอแสดงผลกราฟิกแบบ OLED ซึ่งเขียนด้วยภาษาไพธอนจะพบว่าการทำงานนั้นสะดวกรวดเร็วในระดับดี แต่เมื่อต้องใช้กับไมโครคอนโทรลเลอร์ตัวอื่นที่ไม่สามารถใช้ Micropython หรือ CircuitPython ได้นั้นจะต้องทำอย่างไร ซึ่งหนึ่งในหลายทางเลือกคือไลบรารี u8glib หรือ u8g2 (Universal 8 bit Graphics Library) ที่ออกแบบมาเพื่อทำงานกับกราฟิกแบบ 8 บิตแบบโมโนโครมทั้งผ่านการสื่อสารแบบ I2C หรือ SPI โดยบทความนี้ใช้อุปกรณ์ต่อเชื่อมกันดังภาพที่ 1 ด้วยการใช้ OLED แบบ I2C

ภาพที่ 1 การเชื่อมต่อ STM32F401CCU6 กับ OLED แบบ I2C
Read More