This article discusses how to use Arduino with the LGT8F328P microcontroller, a microcontroller similar to the Atmel AVR atmega328P used on the Arduino Uno and Arduino Nano family, but with additional capabilities such as higher speed and has a higher resolution for converting analog signals and having a digital-to-analog converter as well, so this article will start from properties, board installation and example of using the features of this microcontroller.
LGT8F328P
LGT8F328P is an 8-bit RISC architecture microcontroller produced by LogicGreen Technology Co., LTD with 131 instruction sets, most of which are completed in just a clock cycle. The features are as follows:
- There are 32 8-bit registers (R0, .., R31).
- The memory of LGT8F328P has 32KB Flash and 2KB SRAM.
- Two 8-bit Timer/Counter that can be run separately in Prescaler or Compare mode.
- Two 16-bit Timer/Counters that can be run separately in Prescaler, Compare and Capture modes.
- There are 9 PWM channels.
- There is an ADC (Analog-to-Digital Converter) with a resolution of 12 bits.
- There is a DAC (Digital-to-Analog Converter) with 8-bit resolution.
- There is a programmable WDT (Watch-dog timer).
- Support
- USART
- SPI
- I2C
- TWI
- EZPROM for internal storage which can be scaled by sharing space with Flash ROM as in the following table.
| Flash ROM | EZPROM |
|---|---|
| 32KB | 0KB |
| 30KB | 1KB |
| 28KB | 2KB |
| 24KB | 4KB |
| 16KB | 8KB |
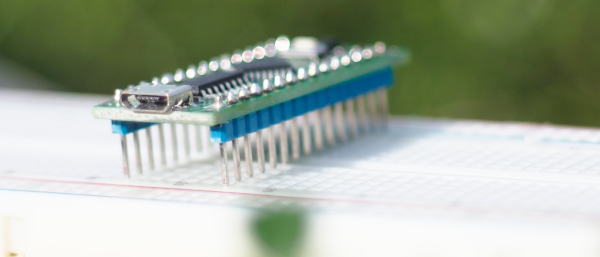
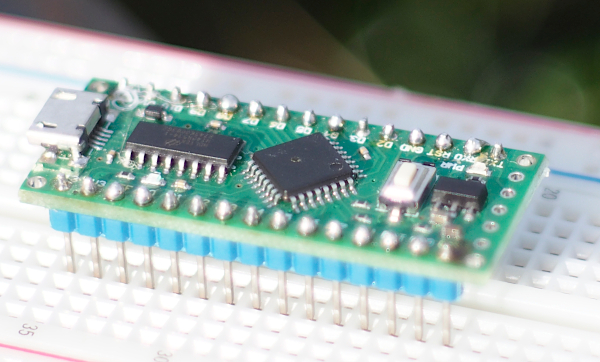
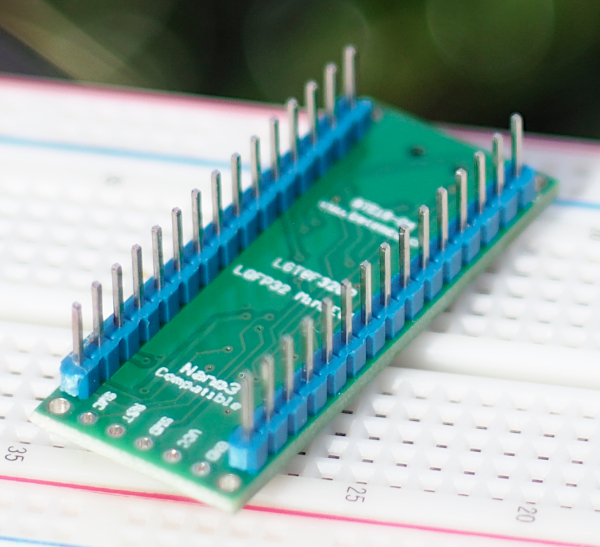
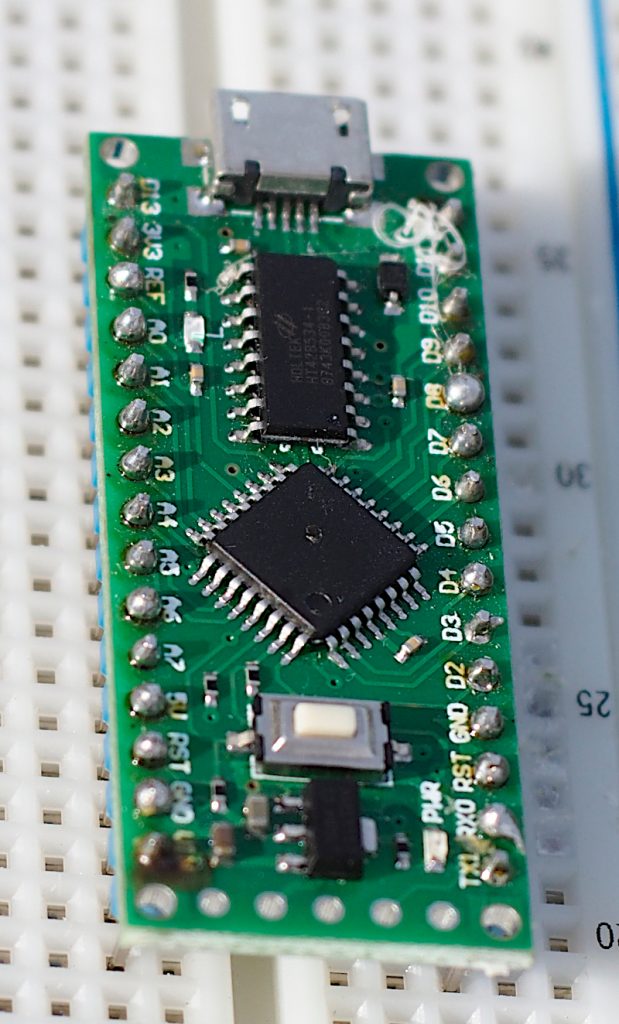
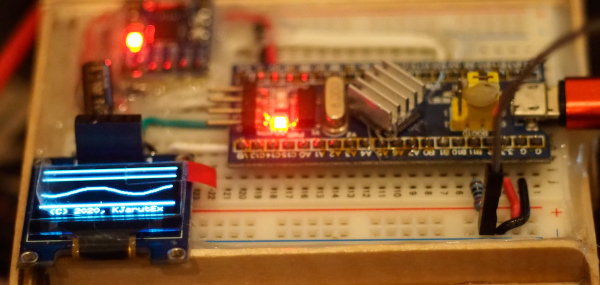
Figure 2 is the board that uses the LGT8F328P, the QFP32L body, the back, and the arrangement of the pins is as shown in the 3rd and 4th pictures.
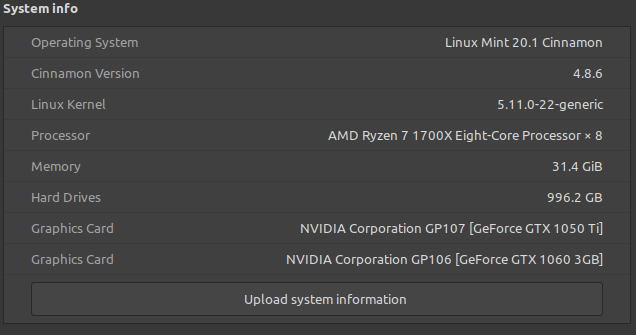
The USB interface is based on Holtek‘s HT42B534 chip, which is a UART/USB converter, supports USB2.0 communication standards, achieves a maximum baud rate of 3Mbps, and operates in the 3.3VDC to 5.5VDC voltage range. Operating in Windows, Android, MacOS and Linux (we use Linux Mint 20.1 as shown in Figure 5), allowing programming to work with a variety of operating systems.
Board installation
The board can be installed in two ways: using JSON and downloading the file in a folder Arduino/hardware.
Installing with JSON
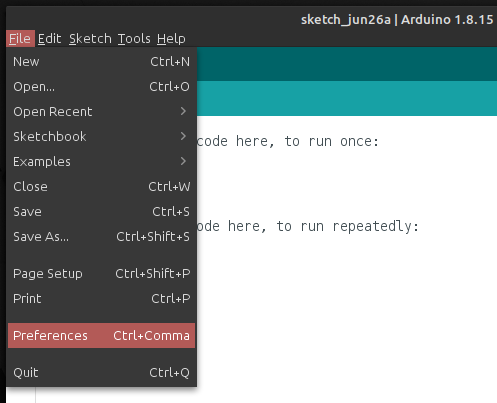
Installing the Arduino IDE to recognize the board LFT8F386P is done by going to the menu File/Preferences as shown in figure 6 and the window as shown in figure 7 will be displayed.
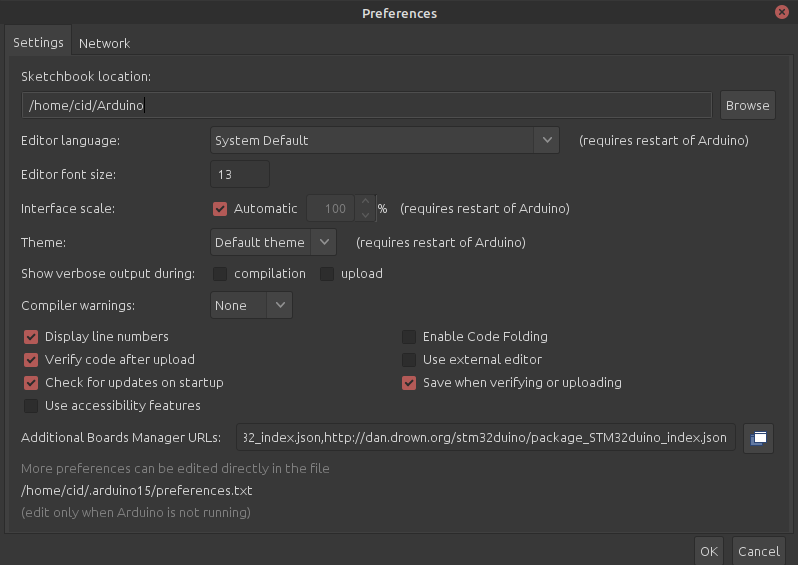
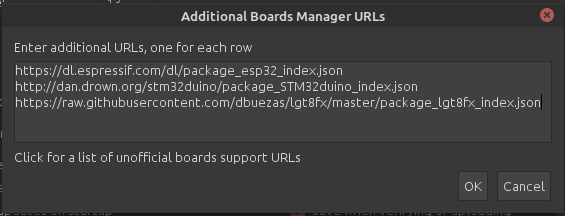
From Figure 7, click on the icon on the right of Additional Boards Manager URLs, a window for inserting board inventory items will appear as shown in Figure 8. Add the following items: After that close the window to return to the program screen.
- https://raw.githubusercontent.com/dbuezas/lgt8fx/master/package_lgt8fx_index.json
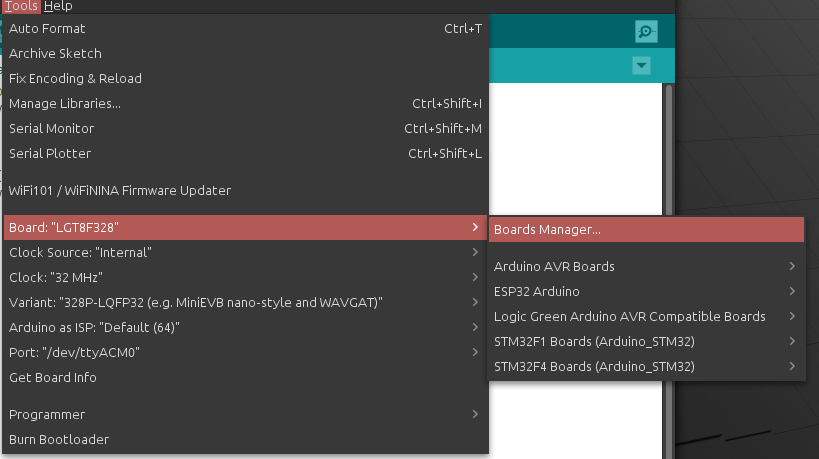
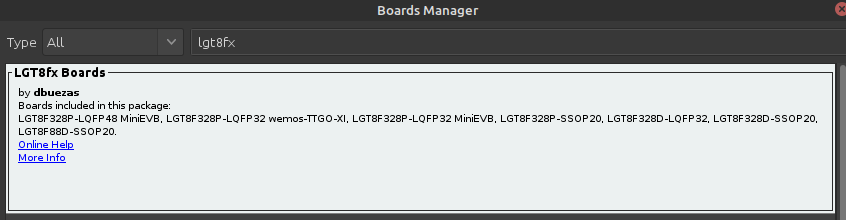
Go into the Tools menu, select Board: xxx (depending on which board was previously selected), and select the sub-item Boards Manager … as shown in figure 9 to select to install the board list, type LGT to search as shown in figure 10 and install it after that closes the window
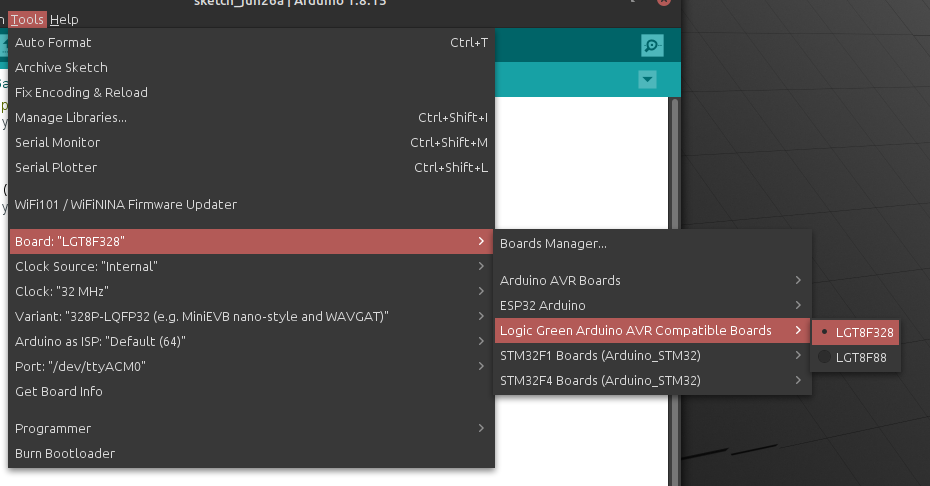
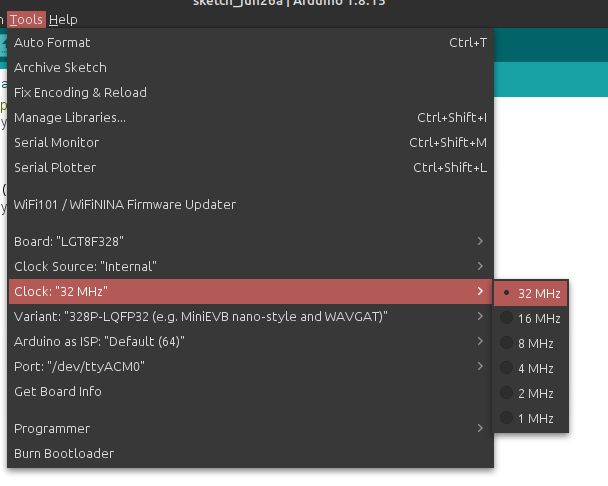
Finally, select the board list as LGT8F328 as shown in figure 11, and set the port with the frequency that can be selected up to 32MHz as shown in figure 12.
Install by pasting board data files
This method requires access to download files from https://github.com/LGTMCU/Larduino_HSP by clicking Code/Download ZIP as shown in Figure 12.

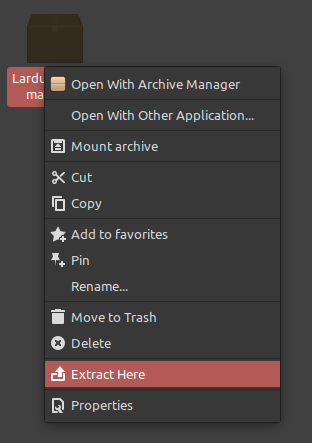
When you get a compressed file as shown in Figure 13, extract the file by right-clicking on the file to extract it as shown in Figure 14.
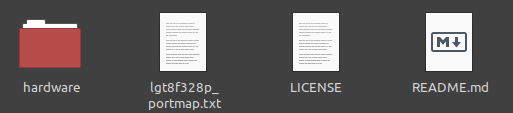
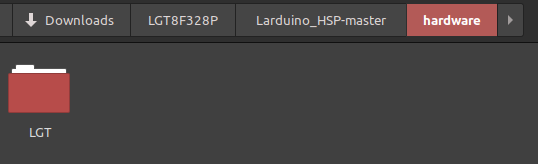
When the file is decompressed, you will get a folder as shown in figure 15. Go into the folder and you will find a list of hardware folders as shown in figure 16. Copy the LGT folder (Picture 17) in the hardware folder and paste it into Arduino/hardware. In the Windows and macOS operating system, the folder is located in Documents/Arduino/hardware, in Linux depends on the installation if installed from repo it will be located in Documents/Arduino/hardware But if downloaded and installed by yourself, it will be at ~/Arduino/hardware.
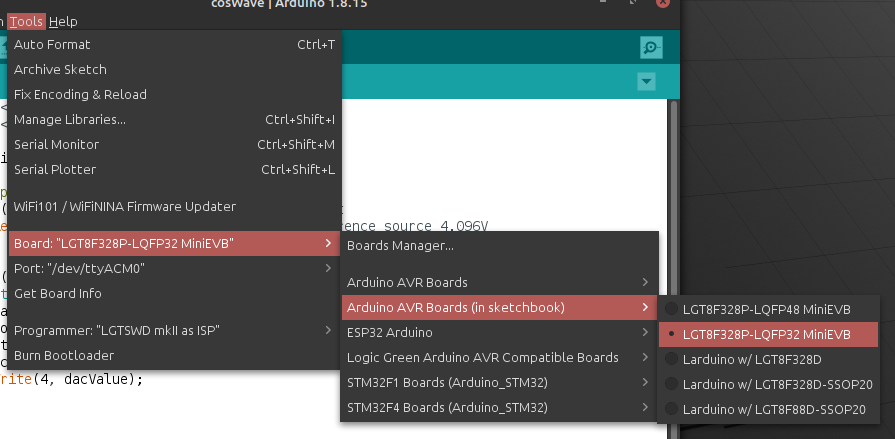
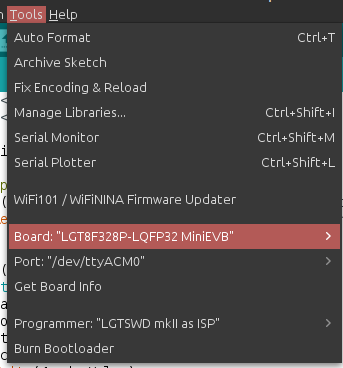
Board selection is done by open Tools/Bord:Previously selected item/Arduino AVR Boards (in sketchbook) and then select LGT8F328P-LQFP32 MiniEVB as shown in figure 18. After that, you will get a list of board information as shown in figure 19.
Example Code
Example 1
An example program to read ADC values from pin A0 can be written as follows.
#include <Arduino.h>
#define pinADC A0
void setup() {
  Serial.begin(115200);
  pinMode( pinADC, INPUT );
}

void loop() {
  int aValue = analogRead( pinADC );
  float approxVDC = 3.3*(aValue/1024.0);
  Serial.print("ADC value = ");
  Serial.print(aValue);
  Serial.print(" approximate V = ");
  Serial.println(approxVDC);
  delay(1000);
}
Example 2
The next example is the cosine wave output as shown in Figures 20 and 21.
#include <Arduino.h>
#include <math.h>

#define pi 3.141592654

void setup() {
  pinMode(4, ANALOG);     // D4
  analogReference(INTERNAL4V096);   //Internal reference source 4.096V
}

void loop() {
 for(float i=0;i<(2*pi); i+=0.01) {
  float rad=pi*i;
  float cosValue = cos(rad);
  long intCosValue = cosValue*300;
  byte dacValue = map(intCosValue,-300,300,0,255);
  analogWrite(4, dacValue);
  }
}
Example 3
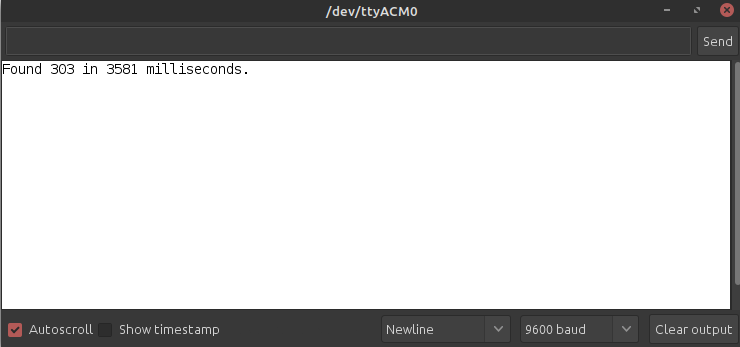
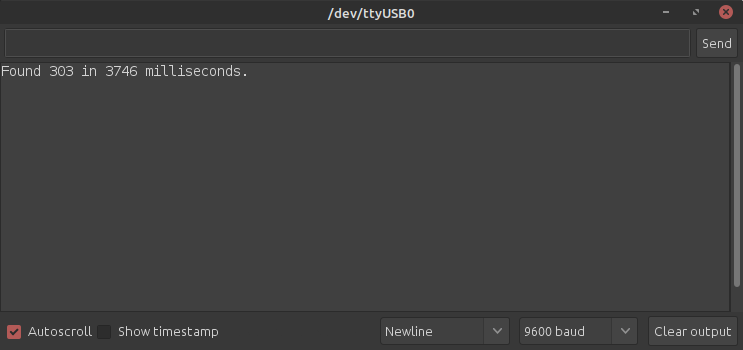
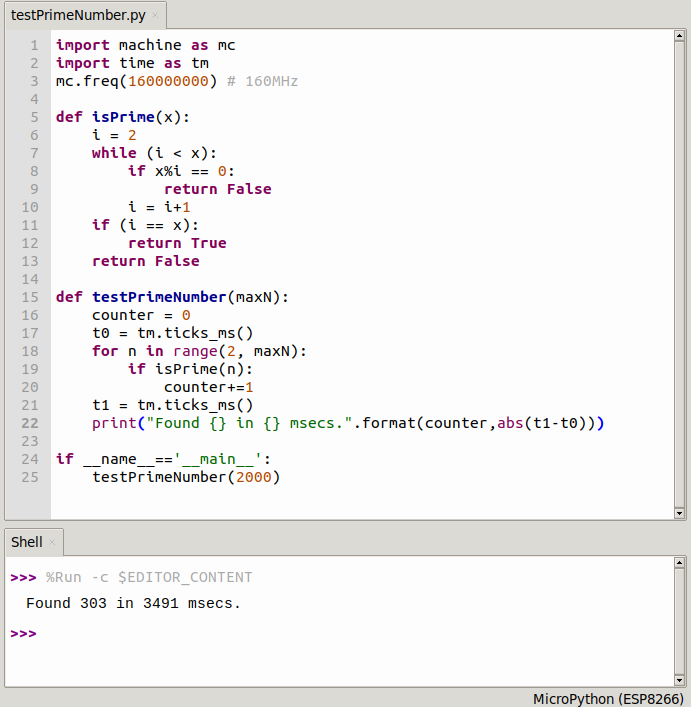
The example code for detecting Prime Number from 2 to 2000, the result is as shown in Figure 22, and when tested with Arduino Uno, the result is as shown in Figure 23. In figure 24 is of Arduino Mega256, however, when looking at the result when using Micropython of ESP8266 in Figure 25, it can be seen that it works fairly quickly. Figures 26 and 27 are the results of ESP8266 written in Arduino with STM32F103C8. However, esp8266 and stm32f103c8 are 32-bit microcontrollers, so they should not be compared seriously with 8-bit microcontroller
#include <Arduino.h>
#include <math.h>

bool isPrimeNumber(uint16_t x) {
  uint16_t i;
  for (i = 2; i < x; i++) {
    if (x % i == 0) {
      return false;
    }
  }
  if (i == x)
    return true;
  return false;
}

int counter = 0;
uint32_t t0, t1;
void testPrimeNumber(uint16_t maxN) {
t0 = millis();
  for (uint16_t n = 2; n < maxN; n++) {
    if (isPrimeNumber(n)) {
      counter++;
    }
  }
  t1 = millis();
}

void setup() {
  Serial.begin(9600);
  testPrimeNumber(2000);
  Serial.print("Found ");
  Serial.print(counter, DEC);
  Serial.print(" in ");
  Serial.print(int(fabs(t1 - t0)), DEC);
  Serial.println(" milliseconds.");
}

void loop() {
}


Conclusion
Based on our team’s experiments, the LGT8F328P is fully compatible with the Arduino IDE, running slightly faster than the Atmel 328P at the same clock (usually running at clock_div_2), but at a lower cost, with support for more granular ADCs and a can create 8-bit DAC, which is enough for a board to control devices by communicating with more complex boards such as the ESP8266 as a command via I2C bus and using ESP8266 as IoT communication, etc. Finally, have fun with programming, and feel free to leave comments below.
References
(C) 2020-2021, By Jarut Busarathid and Danai Jedsadathitikul
Updated 2021-10-09