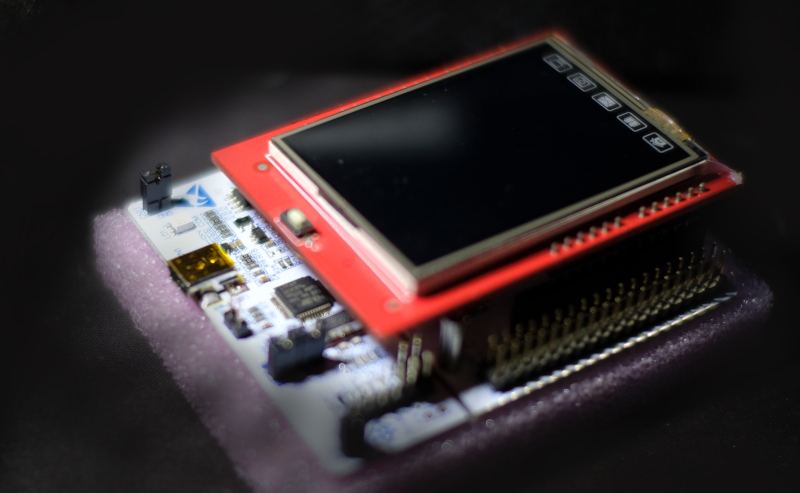
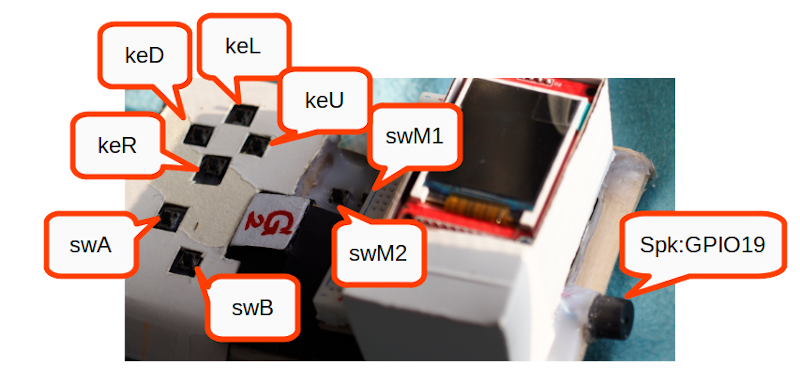
From the previous article that has used a 3.5″ display for Raspberry Pi Board to use with ESP32, we also have an Arduino 2.4″ TFT LCD & Touch Shield that is used with Arduino Uno and Arduino Mega (as shown in Figure 1. ) and want to use with a microcontroller STM32F401RET6 Board NUCLEO-F401RE and STM32F401CC (Figure 2), which are Cortex-M4 with 96KB and 64KB memory respectively, ROM memory is 512KB and 128KB, with 8 switches connected to the pin. In this article, Board ET-TEST 10P/INP (Figure 3) is used to replace the left, up, down, right, m1,m2, A and B buttons respectively.
Because we bought a 3.5″ display for the Raspberry Pi board to use and wonder if it can be used with the ESP32 board or not. Therefore, this article talks about how to use a TFT LCD Shield designed forWaveshare’s Raspberry Pi with the TTGO T8 ESP32 microcontroller via the TFT_eSPI library to display and operate a touch screen system as shown in Figure 1.
We have been using the esp8266, especially the esp-01 and esp-01s modules, to manage the sensor network for quite some time and with the limitation in terms of the number of pins used, the system must be designed to work with STM32F103C8T6 or STM32F401CCU6/STM32F411CEU6. To ensure stable operation, no problems with the esp8266’s WDT were encountered, and over time, espressif released several other microcontrollers such as esp32, esp32-s2, esp32-c3 and esp32-s3.
We have tested and used esp32 almost all the time until esp32-s2 with LILYGO board made us try to order it. The main problem is that the development tools are very late. However, as of now, espressif has released a development kit for Arduino or Arduino Core for ESP32 version 2.0 with support for esp32 esp32-s2 and esp32c3, making it work with ESP32 and ESP32-S2. We got the esp-c3-32s board so this article was born.
This article is compiled from the datasheet of ESP32-C3 WROOM-02, in this article we use the board as shown in Figure 1. The example program is to drive an RGB LED on the board to work by using Arduino Core for ESP32 and the improved ESP-IDF from the article in Ep. 3
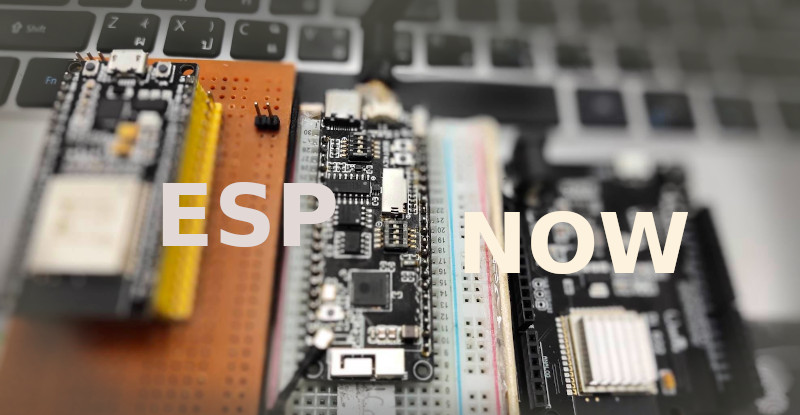
The article discusses the use of communication developed by espressif to communicate between its microcontrollers via wireless communication, as an alternative to the development of a non-linear Client/Server system. It describes the working process of working as a service provider, commander, and a set of related instructions through the Arduino core, along with explaining the working examples that come with both Arduino cores, which are basic and Multi-slave, which can be applied variously.
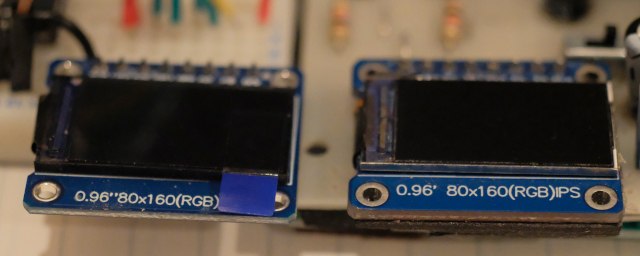
This article describes setting up the Arduino’s TFT_eSPI library to use the ST7735s-controlled TFT LCD that was written as an example in a previous article in Python. We found that there are 2 0.96″ LCD IPS ST7735s models, which are GREENTAB160x80 and REDTAB160x80. Both modules differ in the spacing between them, as shown in Figure 1. This article uses the ESP8266, ESP32 DO-IT DevKit version with ESP32CAM and STM32F103C8T6. It is a board to test the functionality of the program.
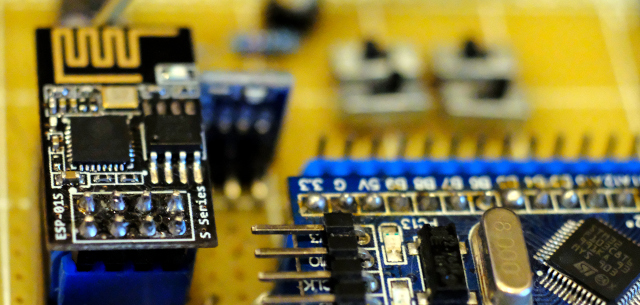
This article is an example of using the Arduino framework’s NTP and TimeLib libraries with either the ESP-01s (Figure 1) or esp8266 to report the current time via the web served by the esp8266, which in this example is called NTPClient and TimeLib libraries. An Internet connection is required to read the date and time from an NTP provider such as time.nist.gov.