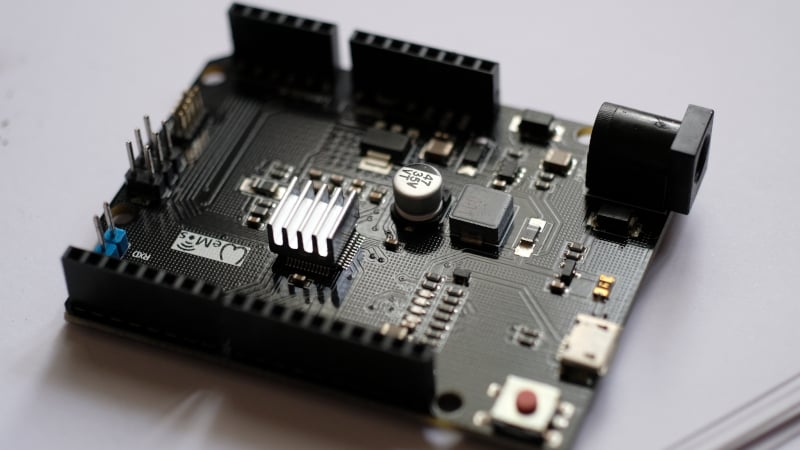
This article introduces a microcontroller board based on Microchip’s ATSAMD21G18 chip based on 32-bit ARM architecture, Cortex-M0+ family in the form of a board based on the Arduino Uno family as shown in Figure 1.
Properties
The microcontroller board that we choose to use uses the ATSAMD21G18 chip with the following features:
- Operates at a maximum frequency of 48MHz.
- Hardware supports multiplying in a single cycle.
- 32KB of SRAM memory.
- 256KB of flash memory.
- 6 serial communication ports (SERCOM) that can be configured to function as the following communications.
- UART/USART
- SPI
- 3.4MHz I2C
- SMBUS/PMBUS
- LIN Slave
- 5 sets of 16-bit Timer/Counter that can be set to work as follows.
- 16 bit TC with compare and capture
- 8 bit TC with compare and capture
- 32 bit TC with compare and capture
- 3 sets of 24-bits Timer/Counter
- 32-bit RTC (Real Time Clock) that works as a clock and calendar.
- 20 PWM channels
- a 12-bit ADC channel, running at 350ksps or 350,000 times per second.
- a 10-bit DAC channel at 350kpsps speed.
- Operates at voltage 1.62 to 3.63V.
- Supports 16 external interrupt sources.
- Programmable with SWD
- There are idle and sleep modes to save energy.
- There are 12 channels of DMAC or Direct Memory Access Control.
- There are 12 channels of event support system.
- Support Touch Control (PTC) up to 256 characters.
Installation
Installation can be done in two ways:
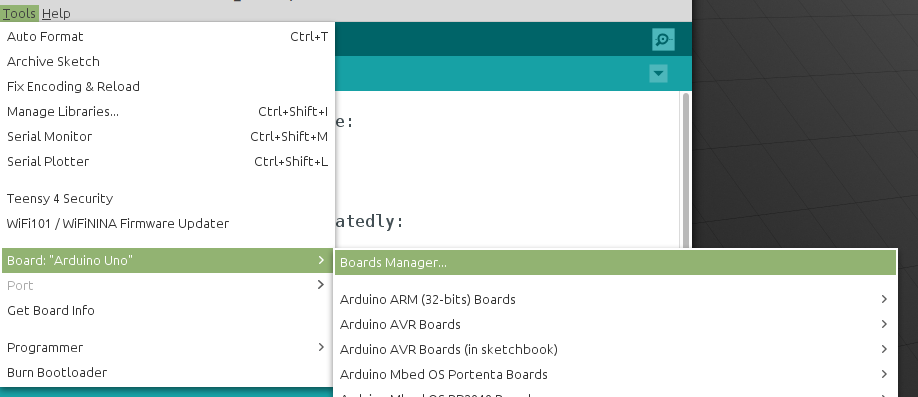
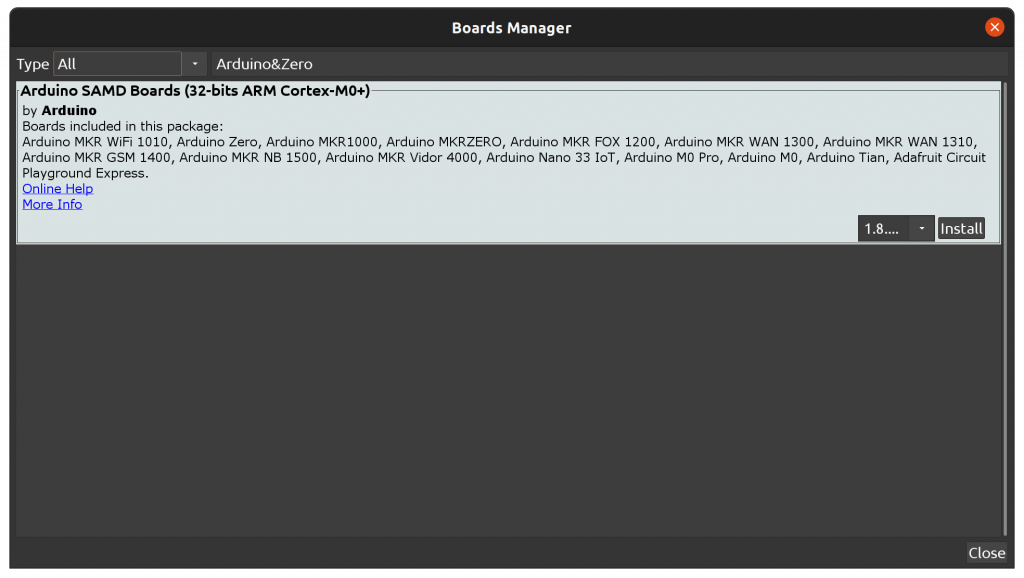
- Plug the board and open the Arduino IDE program. If the system has not installed it before, there will be a message warning to install the board as shown in Figure 3. After that, enter the Boards Manager window and there is a list of boards to choose from as shown in Figure 4 then click on install.
- Install it yourself by entering program Arduino IDE and selecting Menu Boards Manager … from the list of Boards of Tools menu as shown in Figure 2. After that, in the Boards Manager screen, find Arduino SAMD Boards (32-bits ARM Cortex-M0+) as shown in Figure 4, then click install.

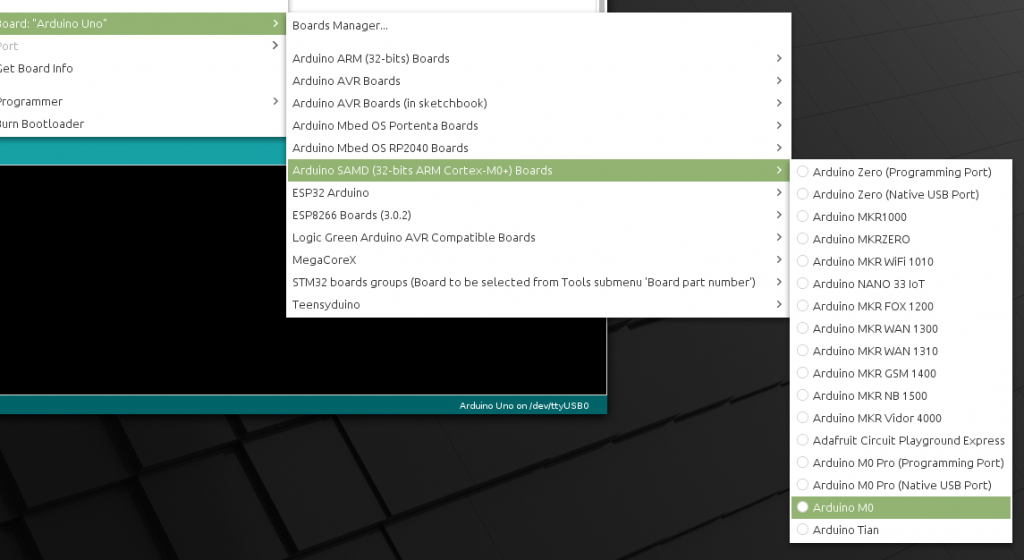
Once installed, this time it’s ready to use. But the board that I bought is the successor model of Arduino Zero, so select Board Arduino Zero (Native USB Port) from the list in the Arduino SAMD (32-bits ARM Cortex-M0+) menu from the Board menu item of the Tools menu as shown in Figure 5.
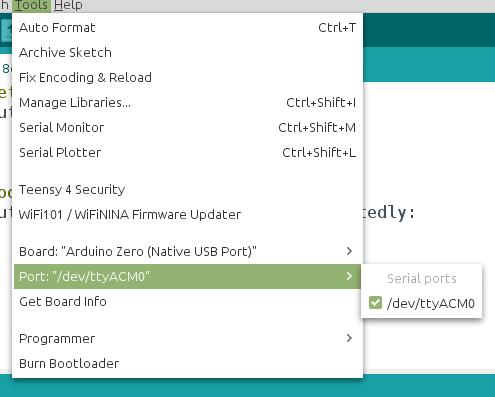
Finally, check that the port is correct as in the example in Figure 6.
Example Code
An example program for finding prime numbers that is displayed through the USB serial port of the board uses the SerialUSB class instead of Serial in normal programs which on the board has a class for communicating with 3 serial ports to use as follows
- Serial for the Tx/Rx pins that are attached to the ICSP connectors.
- SerialUSB for using communication from the USB port of the board.
- Serial1 for use via the original Tx/Rx pins of the board in the form of Arduino Uno.
Code
uint32_t counter = 0;
uint32_t t0, t1;
uint32_t t2000;

uint32_t isPrimeNumber(uint32_t x) {
  uint32_t i;
  for (i = 2; i < x; i++) {
    if (x % i == 0) {
      return 0;
    }
  }
  if (i == x)
    return 1;
  return 0;
}


void testPrimeNumber(uint32_t maxN) {
  counter = 0;
  t0 = millis();
  for (uint32_t n = 2; n < maxN; n++) {
    if (isPrimeNumber(n)) {
      counter++;
    }
  }
  t1 = millis();
}


void setup() {
  SerialUSB.begin(115200);
  SerialUSB.println();
}

void loop() {
  testPrimeNumber(2000);
  SerialUSB.print("\n\nTest 2,000 times : Found ");
  SerialUSB.print(counter, DEC);
  SerialUSB.print(" in ");
  t2000 = int(fabs(t1 - t0));
  SerialUSB.print(t2000, DEC);
  SerialUSB.println(" milliseconds.");
  delay(15000);
}
The results are as follows which will find that it takes 308 milliseconds

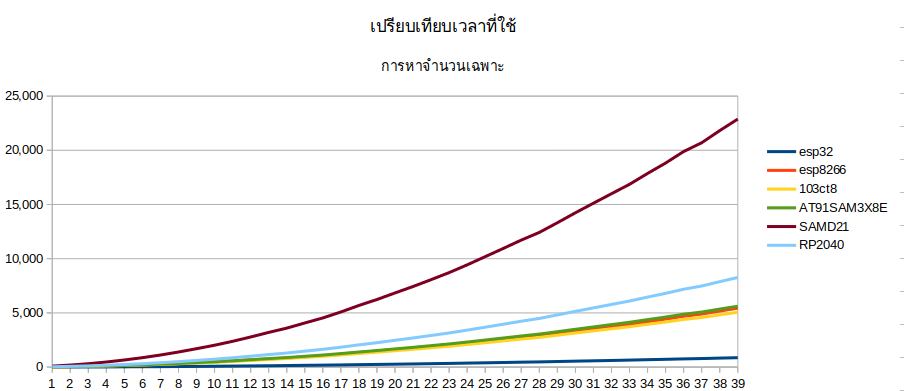
Comparing prime numbers in the range of 2-1000 to 2 to 20,000, with each round incrementing 5000 increments of esp32, esp8266, STM32C103, Arduino Due, SAM-D21, and Raspberry Pi PICO, the graph is shown in Figure 7.
Conclusion
From this article, you will find that the SAMD21 board is a 32-bit ARM microcontroller that supports both ADC and DAC functions with a larger amount of memory than the Arduino Uno and is sufficient for a very simple level of use. It also provides 3 serial communication ports to be used simultaneously, making it possible to use with ESP32 to compensate for the ADC and DAC function by sending data between Serial1 of each board. Finally, have fun with programming.
References
- Starting Electronics. (2018). WeMos SAMD21 Arduino M0 Quick Start Tutorial. Since 2021-11-18
- MicroChip. (2021). SAM D21/DA1 Family. Since 2021-11-18
(C) 2020-2022, By Jarut Busarathid and Danai Jedsadathitikul
Updated 2022-01-22