[EN] How to used Arduino 2.4″ TFT LCD&Touch Shield with STM32F401?

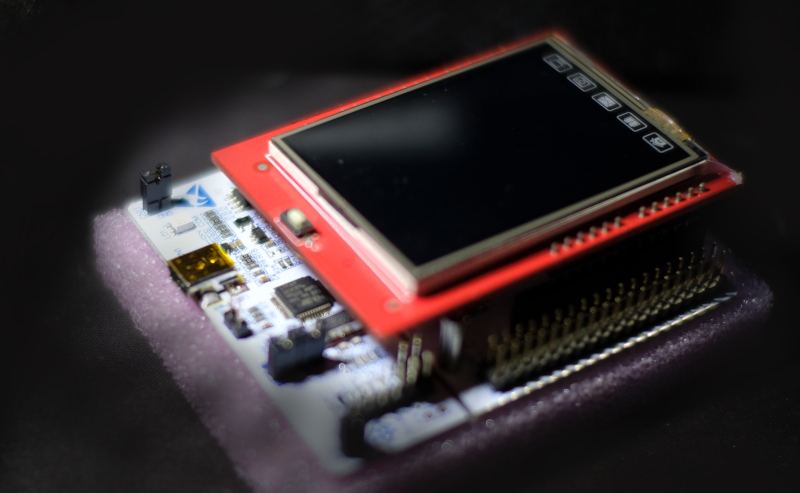
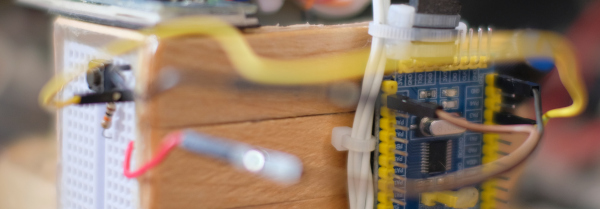
From the previous article that has used a 3.5″ display for Raspberry Pi Board to use with ESP32, we also have an Arduino 2.4″ TFT LCD & Touch Shield that is used with Arduino Uno and Arduino Mega (as shown in Figure 1. ) and want to use with a microcontroller STM32F401RET6 Board NUCLEO-F401RE and STM32F401CC (Figure 2), which are Cortex-M4 with 96KB and 64KB memory respectively, ROM memory is 512KB and 128KB, with 8 switches connected to the pin. In this article, Board ET-TEST 10P/INP (Figure 3) is used to replace the left, up, down, right, m1,m2, A and B buttons respectively.

Nucleo-F401RE+Arduino Uno 2.4" TFT&Touch Shield
(Figure. 1 Arduino Uno TFT&Touch Shield module on Nucleo-F401RE)
Read More

[EN] Bare Metal Cortex-M Ep.3

From the previous article, we have experimented with controlling the digital signal output by driving the LED circuit connected to the STM32 microcontroller board, both Cortex-M0, Cortex-M3 and Cortex-M4. to import digital signals and use an example of connecting a switch circuit to control the on or off of an LED lamp as shown in Figure 1.

(Figure. 1 Our board in this article)
Read More

[TH] How to used Arduino 2.4″ TFT LCD&Touch Shield with STM32F401?

จากบทความก่อนหน้านี้ที่ได้ใช้จอแสดงผลขนาด 3.5″ สำหรับบอร์ด Raspberry Pi มาใช้งานกับ ESP32 ไปแล้ว ทางทีมงานเรายังมี Arduino 2.4″ TFT LCD&Touch Shield ที่ใช้กับ Arduino Uno และ Arduino Mega (ดังภาพที่ 1) และต้องการใช้งานกับไมโครคอนโทรลเลอร์ STM32F401RET6 ด้วยบอร์ด NUCLEO-F401RE และ STM32F401CC (ภาพที่ 2) ซึ่งเป็น Cortex-M4 ที่มีหน่วยความจำ 96KB และ 64KB ตามลำดับ ส่วนหน่วยความจำ ROM นั้นเป็น 512KB และ 128KB พร้อมทั้งทำการเชื่อมต่อสวิตช์จำนวน 8 ตัวเข้ากับขาของไมโครคอนโทรลเลอร์ โดยในบทความนี้ใช้บอร์ด ET-TEST 10P/INP (ภาพที่ 3) เพื่อใช้แทนปุ่มซ้าย, บน, ล่าง,ขวา, m1,m2, A และ B ตามลำดับ

Nucleo-F401RE+Arduino Uno 2.4" TFT&Touch Shield
ภาพที่ 1 โมดูล Arduino Uno TFT&Touch Shield บนบอร์ด Nucleo-F401RE
Read More

[TH] Bare Metal Cortex-M Ep.4

บทความนี้กล่าวถึงการใช้งานพอร์ตสื่อสารอนุกรม UART ซึ่งนิยมใช้มานาน และสะดวกต่อการใช้งาน โดยใช้ขา PA9 และ PA10 ต่อเข้าเป็นขา Tx และ Rx ของไมโครคอนโทรลเลอร์ทั้ง cortex-M0/M3/M4 เชื่อมต่อกับขา Rx/Tx ของตัวแปลงระดับแรงดันสัญญาณสำหรับสื่อสารผ่านทางพอร์ต USB ซึ่งตัวอย่างโปรแกรมเป็นการประมวลผลในไมโครคอนโทรลเลอร์และนำออกผลลัพธ์ผ่านทางพอร์ตสื่อสารอนุกรมที่ใช้งานโปรแกรม moserial เป็นซอฟต์แวร์สื่อสารข้อมูลดังภาพที่ 1

ภาพที่ 1 ตัวอย่างผลลัพธ์จากการทำงานของโปรแกรมตัวอย่าง
Read More

[TH] Bare Metal Cortex-M Ep.6

หลังจากได้ใช้คำสั่ง HAL สำหรับสั่งงาน Cortex-M0/M3/M4 ไปกันพอสมควร ครั้งนี้มาประยุกต์เพื่อขับเคลื่อนหุ่นยนต์รถ 2 ล้อให้เดินหน้า ถอยหลัง หันซ้าย หันขวา และหยุดกันบ้าง ดังนั้น ในบทความนี้กล่าวถึงการประยุกต์ใช้ GPIO เพื่อส่งสัญญาณ 0 หรือ 1 ไปยังพอร์ตที่ต่อกับภาคขับมอเตอร์ดังภาพที่ 1 เพื่อให้ตัวหุ่นนั้นเคลื่อนที่

ภาพที่ 1 หุ่นยนต์เคลิื่อนที่ด้วยล้อ
Read More

[TH] Bare Metal Cortex-M Ep.3

จากบทความก่อนหน้านี้ได้ทดลองควบคุมการนำออกสัญญาณดิจิทัลด้วยการขับวงจรแอลอีดีที่เชื่อมต่อกับบอร์ดไมโครคอนโทรลเลอร์ STM32 ทั้งแบบ Cortex-M0, Cortex-M3 และ Cortex-M4 ในบทความนี้กล่าวถึงการใช้งานขาเพื่อนำเข้าสัญญาณดิจิทัล และใช้ตัวอย่างการต่อวงจรสวิตช์เพื่อควบคุมการติดหรือดับของหลอดแอลอีดีดังภาพที่ 1

ภาพที่ 1 ภาพตัวอย่างของการทดลองใน Ep3
Read More