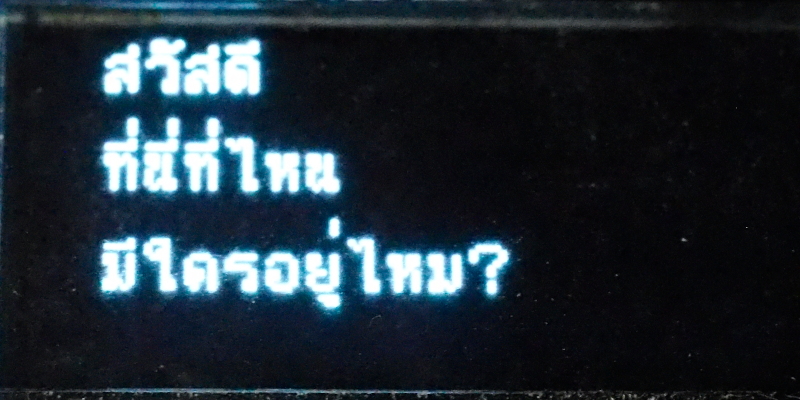
From the article on how to use u8g2 that can render Thai string through the drawUTF8() function of the u8g2 library, the rendering is not correct as shown in Figure 1, therefore, the code of libraries needs additionally adjusted to render correctly as in Figure 2.
Figure 1 drawUTF8() display before adjustmentFigure 2 drawUTF8() after adjustmentRead More
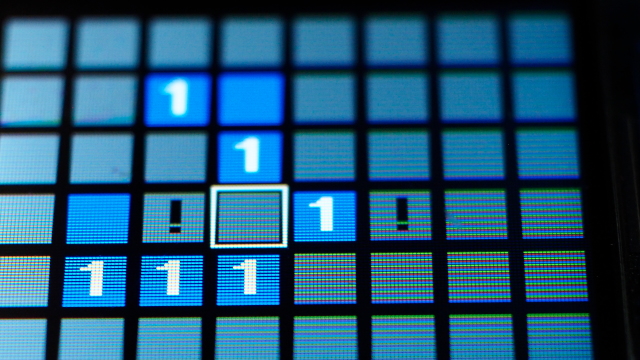
This article is an experiment to create a Simple MineSweeper as shown in Figure 1, using an ESP32 microcontroller board with a 1.8″ REDTAB st7735 display. The display resolution is 128×160, the same hardware as Simple Tetris [Part 1, Part 2 and part 3] mentioned earlier, still using MicroPython as the main. The explanation starts step by step from screen generation, randomization, counting, motion control, scrolling the options frame turn off visibility, establishing a relationship between identifying where the bomb is likely to be, picking open and counting points at the end of the game.
Simple MineSweeper is one of the first games we’ve been imitating to study ideas and develop programming techniques since the DOS era and the GUI-based Windows operating system DOS, which was written and worked on the DOS operating system at the time, change the mode to graphics mode to contact with mouse and draw pixels by yourself (It’s the same thing as writing on the ESP32 microcontroller board, but it doesn’t have an operating system to use) So let’s get started.
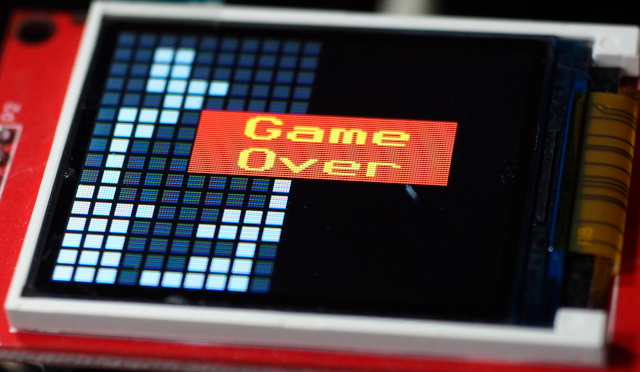
The final article on making a Simple Tetris game using MicroPython and an esp32 microcontroller, as written in parts 1 and 2 of the first two articles, is described in the article below. Readers learn to design data structures, drawing the seven types of falling objects and controlling them to move left, right, and rotate. The second article has the object fall from above and keep the object’s position state. And in this article, the falling objects can be stacked along with moving left, right, and rotating the object will check for collisions with previous objects that have fallen before. Also, check if the object falls to the bottom if there are any rows without spaces. If any rows with no spaces are found, they will be deleted. And finally added a section to check the end of the game in case there is no place for objects to fall and move again as in Figure 1, ending our simple game making process.
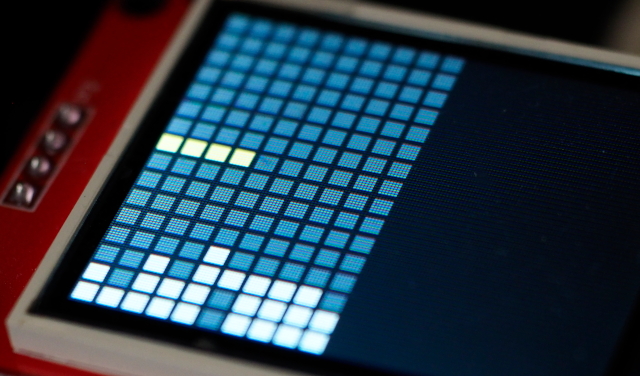
From the previous chapter, we have drawn the background, random objects, object drawing, left and right moving and rotating. In Part 2 of the article, which is the preceding final chapter of the Tetris series, the topic is about creating a backdrop as a grid data structure. If an object falls to the bottom, it converts that object to a table of data as shown in Figure 1, and improves the way the object falls and controls/renders the new object by using a timer without checking for collisions from moving left / right, checking if the falling object overlaps the previous object, rotation and row cutting, which will be discussed in the last article or Simple Tetris Ep.3
This article introduces how to write a simple Tetris game by displaying it in a grid of 10 widths and a height of 16 as shown in Figure 1. Using esp32 microcontroller board connected to ST7735 display and 8 switches for controlling. Importantly it is written in Python via MicroPython compiled using the st7735_mpy library. In this article, we talk about storing 7 types of objects that fall, to support the display and rotation of objects with moving objects left and right. The controls and logic of the Tetris game will be discussed in the next article.
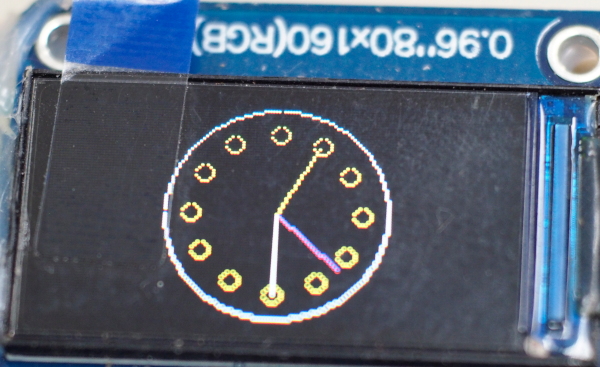
From the article Create a clock that displays an analog display through a color display, this time, it has been modified to make it work as a timer or stopwatch by using the ESP32-CAM board connected to the TFT display and using a switch from pin GPIO0 used as a mode switch or program chip when booting the system or supply power to board ESP32-CAM as shown in Figure 1 and programming still uses Python language with MicroPython as always
The previous article discussed how to improve the display speed by using the double buffer technique. It is applied for the analog clock display as shown in Figure 1. We used Trigonometric calculations to determine the coordinates (x,y) of the tips of the seconds, minutes and hours. Each second operation uses a timer to make the operation closer to real-time than the Loop or Delay.
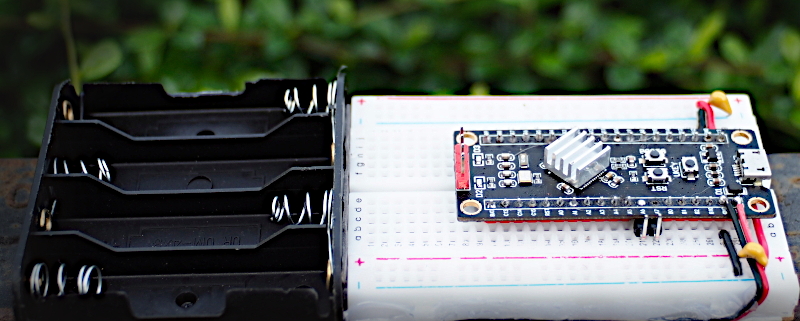
This article discusses the use of USB HID capabilities of STM32F411CEU6 via MicroPython in pyb class, our team was inspired by Dr. Rawat’s article MicroPython for STM32F411 Black Pill: Embedded Programming Style of Siriphokaphirom. So let’s start compiling and uploading the firmware (Read details from Ajarn Dr. Rawat’s article). We use the WeAct STM32F411CEU6 imitation board as shown in Figure 1. When installing MicroPython, there will be a pyb class to use.
In the previous article, we have read the list of devices connected to the serial port of the Raspberry Pi board or RPi with the pySerial library in text mode as shown in Figure 1. This article combines the previous working principles with the use of a graphical user interface via the PyQt5 library, listed in the combobox for users to choose from. If no serial port connected to the board is found, the RPi disables the combobox from user selection. Therefore, this article discusses the implementation of pySerial with the QLabel and QComboBox libraries. PyQt5.
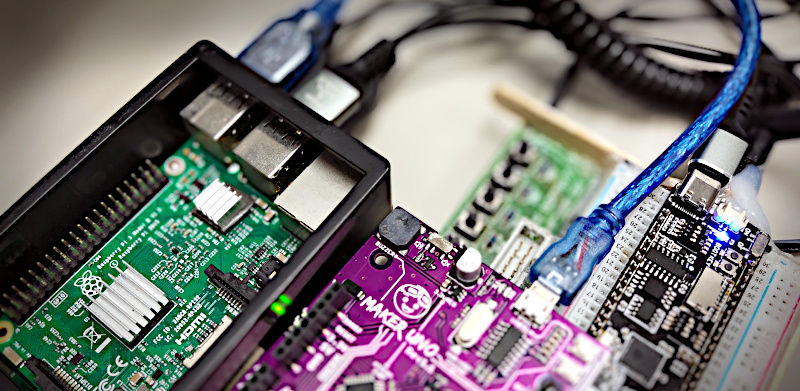
Figure 1 Connected Arduino Uno and ESP32-S2 to Raspberry PiRead More