[EN] I2C Bus/Wire.h

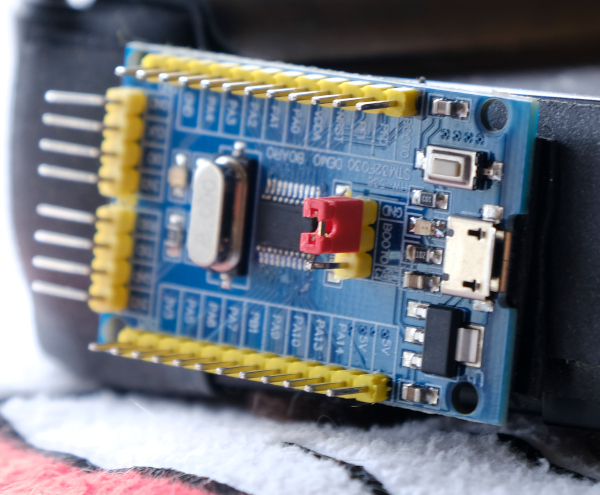
This article describes the methods of Wire.h, a class for communicating with devices over an I2C bus that uses two signal wires called SDA and SCL to transmit data between them. We have quite a number of articles about this type of communication and used as the main bus to develop devices by yourself and run through the bus, for example, articles on using esp8266 to connect to Arduino Uno or using esp8266 with stm32f030f4p6, etc.

Read More

[EN] Bare Metal Cortex-M Ep.3

From the previous article, we have experimented with controlling the digital signal output by driving the LED circuit connected to the STM32 microcontroller board, both Cortex-M0, Cortex-M3 and Cortex-M4. to import digital signals and use an example of connecting a switch circuit to control the on or off of an LED lamp as shown in Figure 1.

(Figure. 1 Our board in this article)
Read More

[EN] Bare Metal Cortex-M Ep.2

From the previous article, we have tried writing a program to study the elements of various files that we need, we found that there are quite a lot of details and steps. But it is an important basis for those who want to seriously and usefully study Cortex-M0 programming via STM32F030F4P6 (Figure 1), Cortex-M3 with STM32F103C (Figure 32) and Cortex-M4 with STM32F401CCU6 (Figure 27) to study of programming structure with programming tool STM32CubeIDE (Figure 2), which is the main tool used in this series of articles. This is because it combines ST’s complete development kit for ARM, including CubeMX for chip design, compiler toolkit, ST-Link program debugging tool and code editor in one tool,  plus it supports both Windows, Linux and macOS operating systems.

(Figure. 1 STM32F030F4P6 and USB–RS232 )
Read More

[EN] Bare Metal Cortex-M Ep.1

This article is a series of programming articles focused on the Cortex-M0 via the STM32F030F4P6 or any other STM32 microcontroller based on CMSIS, an ARM firmware compiled from vivonomicon.com‘s series of Bare Metal: STM32 Programming articles without using the Arduino framework. In the article EP.1 is a matter of preparation. It consists of creating a link file to link different parts of the code together and the working part file. After that, the result file is uploaded into the microcontroller to complete the program development process.

(Figure. 1 STM32F030F4P6)
Read More

[EN] Arduino: STM32F030F4P6

This article is about using a 32-bit microcontroller board under the Cortex-M0 architecture RISC that is economical but the performance is considerably better than the 8-bit board. However, our team has created an alternative for those who are interested in reading. The article starts with the content about the features of microcontrollers, board installation for Arduino IDE to know and example code to toggle LED, traffic through the USART communication port and Prime numbering test to see the processing speed in an iterative loop.

(Figure. 1 STM32F030F4P6)
Read More

[TH] Bare Metal Cortex-M Ep.4

บทความนี้กล่าวถึงการใช้งานพอร์ตสื่อสารอนุกรม UART ซึ่งนิยมใช้มานาน และสะดวกต่อการใช้งาน โดยใช้ขา PA9 และ PA10 ต่อเข้าเป็นขา Tx และ Rx ของไมโครคอนโทรลเลอร์ทั้ง cortex-M0/M3/M4 เชื่อมต่อกับขา Rx/Tx ของตัวแปลงระดับแรงดันสัญญาณสำหรับสื่อสารผ่านทางพอร์ต USB ซึ่งตัวอย่างโปรแกรมเป็นการประมวลผลในไมโครคอนโทรลเลอร์และนำออกผลลัพธ์ผ่านทางพอร์ตสื่อสารอนุกรมที่ใช้งานโปรแกรม moserial เป็นซอฟต์แวร์สื่อสารข้อมูลดังภาพที่ 1

ภาพที่ 1 ตัวอย่างผลลัพธ์จากการทำงานของโปรแกรมตัวอย่าง
Read More

[TH] I2C Bus/Wire.h

บทความนี้เป็นการอธิบายเมธอดต่าง ๆ ของ Wire.h ซึ่งเป็นคลาสสำหรับสื่อสารกับอุปกรณ์ผ่านบัสประเภท I2C ที่ใช้สายสัญญาณ 2 เส้นเรียกว่า SDA และ SCL สำหรับรับส่งข้อมูลระหว่างกัน ศึ่งพวกเรามีบทความเกี่ยวกับการสื่อสารประเภทนี้ค่อนข้างเยอะ และใช้เป็นบัสหลักในการพัฒนาอุปกรณ์ขึ้นมาเองแล้วเรียกใช้งานผ่านบัส เข่น บทความการใช้ esp8266 เชื่อมต่อกัย Arduino Uno หรือ การใช้ esp8266 กับ stm32f030f4p6 เป็นต้น

Read More

[TH] Bare Metal Cortex-M Ep.3

จากบทความก่อนหน้านี้ได้ทดลองควบคุมการนำออกสัญญาณดิจิทัลด้วยการขับวงจรแอลอีดีที่เชื่อมต่อกับบอร์ดไมโครคอนโทรลเลอร์ STM32 ทั้งแบบ Cortex-M0, Cortex-M3 และ Cortex-M4 ในบทความนี้กล่าวถึงการใช้งานขาเพื่อนำเข้าสัญญาณดิจิทัล และใช้ตัวอย่างการต่อวงจรสวิตช์เพื่อควบคุมการติดหรือดับของหลอดแอลอีดีดังภาพที่ 1

ภาพที่ 1 ภาพตัวอย่างของการทดลองใน Ep3
Read More

[TH] Bare Metal Cortex-M Ep.2

จากบทความก่อนหน้านี้ได้ทดลองเขียนโปรแกรมเพื่อศึกษาองค์ประกอบของไฟล์ต่าง ๆ ที่ต้องใช้งานซึ่งจะพบว่ามีรายละเอียดและขั้นตอนเยอะพอสมควร แต่เป็นพื้นฐานสำคัญสำหรับผู้ต้องการศึกษาการเขียนโปรแกรมควบคุม Cortex-M0 ผ่านชิพ STM32F030F4P6 (ภาพที่ 1), Cortex-M3 ด้วย STM32F103C (ภาพที่ 32) และ Cortex-M4 ด้วย STM32F401CCU6 (ภาพที่ 27) อย่างจริงจัง และมีประโยชน์ต่อการศึกษาโครงสร้างการเขียนโปรแกรมด้วยเครื่องมือเขียนโปรแกรมอย่าง STM32CubeIDE (ภาพที่ 2) ซึ่งเป็นเครื่องมือหลักที่จะใช้ในบทความชุดนี้ เนื่องจากเป็นการรวมชุดพัฒนาสำหรับ ARM ของบริษัท ST แบบครบครันทั้ง CubeMX สำหรับออกแบบการใช้งานชิพ เครื่องมือชุดคอมไพล์เลอร์ เครื่องมือดีบักโปรแกรมผ่าน ST-Link ลงชิพ และชุดแก้ไขโค้ดอยู่ในตัวเดียว แถมรองรับการใช้งานทั้งระบบปฏิบัติการ Windows, Linux และ macOS

ภาพที่ 1 บอร์ด STM32F030F4P6 กับ USB–RS232
Read More