[EN] ESP8266/ESP32 WiFi

The ESP8266 and ESP32 boards are equipped with built-in WiFi connectivity. They can work in both self-application mode (Access Point) and client mode connected to an existing WiFi network or STA. Developers can set the device name (ESSID) or use the default name from the system as MicroPython-xxxx, where x represents the MAC Address of the device, the password is micropythoN (developers can assign new) and the IP Address (IP Address) is 192.168.4.1.
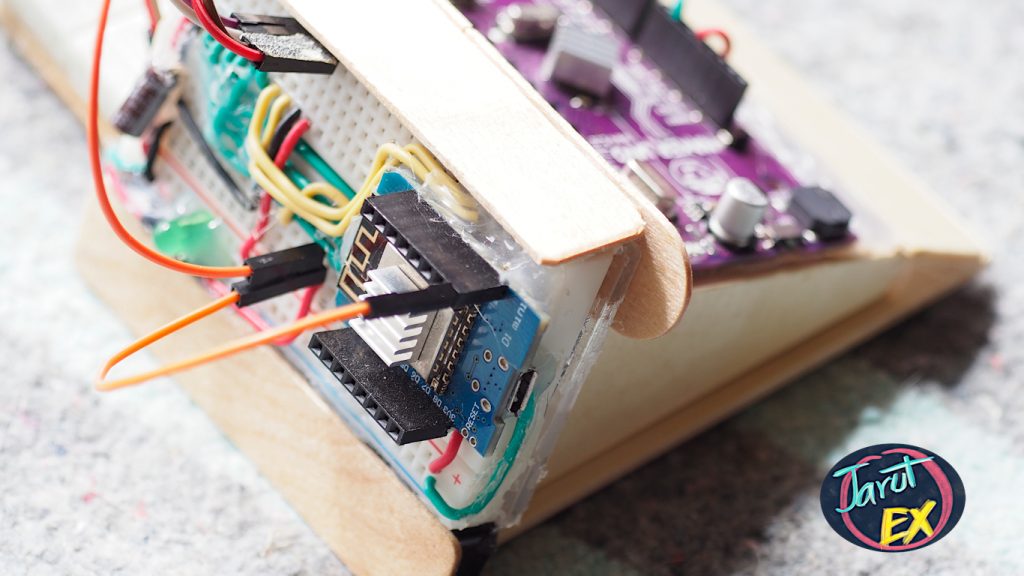
(Figure. Our ESP8266+Uno)
Read More

[EN] u8g2 Library

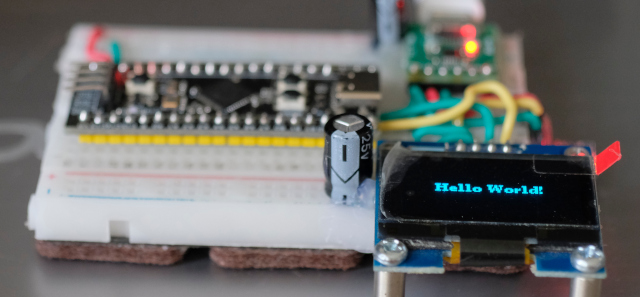
From the article on using the ESP8266 with an OLED graphical display written in Python, you’ll find that it’s fast and easy but when used with other microcontrollers that cannot use Micropython or CircuitPython, what must be done? One of the many options is the u8glib or u8g2 (Universal 8 bit Graphics Library) libraries, designed to work with monochromatic 8-bit graphics over either I2C or SPI communication. In this article, we are using I2C OLED as shown in Figure 1.

(Figure. 1 STM32F401CCU6 with I2C OLED)
Read More

[EN] I2C Bus/Wire.h

This article describes the methods of Wire.h, a class for communicating with devices over an I2C bus that uses two signal wires called SDA and SCL to transmit data between them. We have quite a number of articles about this type of communication and used as the main bus to develop devices by yourself and run through the bus, for example, articles on using esp8266 to connect to Arduino Uno or using esp8266 with stm32f030f4p6, etc.

Read More

[TH] ESP8266/ESP32 WiFi

บอร์ด ESP8266 และ ESP32 เป็นอุปกรณ์ที่มีระบบการเชื่อมต่อสัญญาณ WiFi ในตัว โดยสามารถทำงานได้ทั้งโหมดการให้ตนเองเป็น AP (Access Point) และโหมดลูกข่ายที่เชื่อมต่อเข้ากับเครือข่าย WiFi ที่มีอยู่แล้วหรือ STA โดยผู้พัฒนาสามารถตั้งชื่อของอุปกรณ์ (ESSID) หรือใช้ชื่อตามค่าที่ตั้งจากระบบเป็น MicroPython-xxxx ซึ่ง x แทนค่า MAC Address ของอุปกรณ์ โดยรหัสผ่านเป็น micropythoN (ผู้พัฒนาสามารถกำหนดใหม่ได้) พร้อมรหัสหมายเลขไอพี (IP Address) เป็น 192.168.4.1

ภาพที่ 1 บอร์ดทดลอง ESP8266+Uno ของทีม JarutEx
Read More

[TH] u8g2 Library

จากบทความการใช้ ESP8266 กับจอแสดงผลกราฟิกแบบ OLED ซึ่งเขียนด้วยภาษาไพธอนจะพบว่าการทำงานนั้นสะดวกรวดเร็วในระดับดี แต่เมื่อต้องใช้กับไมโครคอนโทรลเลอร์ตัวอื่นที่ไม่สามารถใช้ Micropython หรือ CircuitPython ได้นั้นจะต้องทำอย่างไร ซึ่งหนึ่งในหลายทางเลือกคือไลบรารี u8glib หรือ u8g2 (Universal 8 bit Graphics Library) ที่ออกแบบมาเพื่อทำงานกับกราฟิกแบบ 8 บิตแบบโมโนโครมทั้งผ่านการสื่อสารแบบ I2C หรือ SPI โดยบทความนี้ใช้อุปกรณ์ต่อเชื่อมกันดังภาพที่ 1 ด้วยการใช้ OLED แบบ I2C

ภาพที่ 1 การเชื่อมต่อ STM32F401CCU6 กับ OLED แบบ I2C
Read More

[TH] I2C Bus/Wire.h

บทความนี้เป็นการอธิบายเมธอดต่าง ๆ ของ Wire.h ซึ่งเป็นคลาสสำหรับสื่อสารกับอุปกรณ์ผ่านบัสประเภท I2C ที่ใช้สายสัญญาณ 2 เส้นเรียกว่า SDA และ SCL สำหรับรับส่งข้อมูลระหว่างกัน ศึ่งพวกเรามีบทความเกี่ยวกับการสื่อสารประเภทนี้ค่อนข้างเยอะ และใช้เป็นบัสหลักในการพัฒนาอุปกรณ์ขึ้นมาเองแล้วเรียกใช้งานผ่านบัส เข่น บทความการใช้ esp8266 เชื่อมต่อกัย Arduino Uno หรือ การใช้ esp8266 กับ stm32f030f4p6 เป็นต้น

Read More

[EN] How to make “ESP8266” read and write to “Arduino UNO Maker” via the I2C bus?

ESP8266 is a device that nicely supports IoT functionality. But one of the downsides of the ESP8266 is the inadequate number of GPIOs or pins for input and output signals that can be used without a problem with the board’s functionality, so expanding ports for the ESP8266 is quite a thing that developers must be faced which can be performed in a several ways such as using PCF8574 as an expansion port via the I2C bus or connecting to Arduino via Serial Port to allow Arduino to work and send the results back via the serial communication port, etc. This article chose to use an Arduino Uno as a board for I / O to the ESP8266 by using the I2C bus operation.

Read More

[TH] How to make “ESP8266” read and write to “Arduino UNO Maker” via the I2C bus?

(วิธีการทำให้ “ESP8266” อ่านและเขียนไปยัง “Arduino UNO Maker” ผ่านบัส I2C.)

ESP8266 เป็นอุปกรณ์ที่รองรับการทำงานแบบ IoT ได้เป็นอย่างดี แต่ข้อเสียประการหนึ่งของ ESP8266 คือ จำนวน GPIO หรือขาสำหรับนำเข้าสัญญาณและนำออกสัญญาณที่สามารถใช้งานได้โดยไม่เป็นปัญหากับการทำงานของบอร์ดมีไม่มากนัก ดังนั้น การขยายพอร์ตให้กับ ESP8266 จึงเป็นสิ่งที่นักพัฒนาต้องประสบพบเจอ ซึ่งสามารถเลือกดำเนินการได้หลายวิธี เช่น ใช้ PCF8574 เป็นพอร์ตขยายผ่านทางบัส I2C หรือเชื่อมต่อกับ Arduino ผ่านทางพอร์ตสื่อสารอนุกรม (Serial Port) เพื่อให้ Arduino เป็นผู้ทำงานและส่งผลลัพธ์กลับมาทางพอร์ตสื่อสารอนุกรม เป็นต้น โดยในบทความนี้เลือกการใช้ Arduino Uno เป็นบอร์ดสำหรับเป็น I/O ให้กับ ESP8266 โดยอาศัยการสั่งงานผ่านทางบัส I2C

Read More