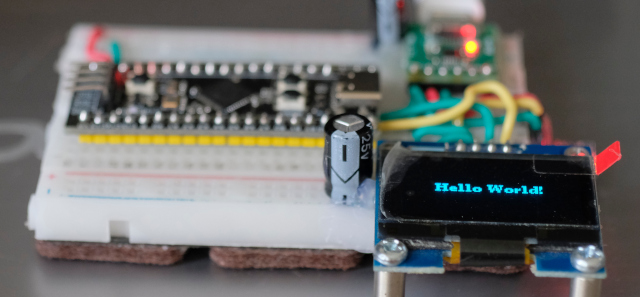
From the article on using the ESP8266 with an OLED graphical display written in Python, you’ll find that it’s fast and easy but when used with other microcontrollers that cannot use Micropython or CircuitPython, what must be done? One of the many options is the u8glib or u8g2 (Universal 8 bit Graphics Library) libraries, designed to work with monochromatic 8-bit graphics over either I2C or SPI communication. In this article, we are using I2C OLED as shown in Figure 1.
Equipment
- STM32F401CCU6, STM32F103C or STM32F411CEU6 or esp8266 or esp32 by connecting to a hardware I2C pin, see the previous article for details on the pin.
- Blue or white OLED module, we use blue one.
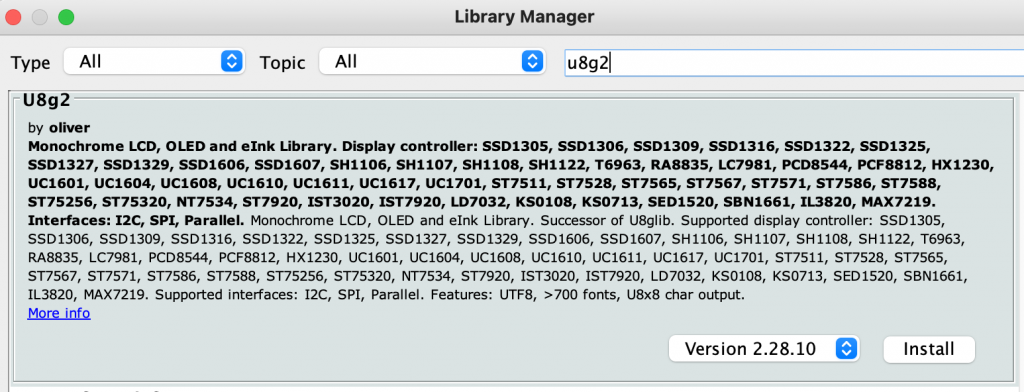
- u8g2 library installed from menu Sketch/Include Library and select Libraries Manager… after that find and install u8g2 as shown in Figure 2.
u8g2
u8g2 is a graphics library for running the controller graphics display module SSD1305, SSD1306, SSD1309, SSD1322, SSD1325, SSD1327, SSD1329, SSD1606, SSD1607, SH1106, SH1107, SH1108, SH1122, T6963, RA8835, LC7981, PCD8544, PCF8812, HX1230, UC1601, UC1604, UC1608, UC1610, UC1611, UC1701, ST7565, ST7567, ST7588, ST75256, NT7534, IST3020, ST7920, LD7032, KS0108, SED1520, SBN1661, IL193820, MAX72
The commands that work with u8g2 are draw line, draws squares and circles, and supports display with a variety of characters and requires memory from the microcontroller for rendering the results.
Selecting the type of display unit
u8g2 support list : SSD1305, SSD1306, SSD1309, SSD1322, SSD1325, SSD1327, SSD1329, SSD1606, SSD1607, SH1106, SH1107, SH1108, SH1122, T6963, RA8835, LC7981, PCD8544, PCF8812, HX1230, UC1601, UC1604, UC1608, UC1610, UC1611, UC1701, ST7565, ST7567, ST7588, ST75256, NT7534, IST3020, ST7920, LD7032, KS0108, SED1520, SBN1661, IL3820, MAX7219. In detail the display resolution and connection bus type, for example:
- U8G2_NULL u8g2(U8G2_R0); // null device, a 8×8 pixel display which does nothing
- U8G2_SSD1306_128X64_NONAME_F_4W_SW_SPI u8g2(U8G2_R0, /* clock=/ 13, / data=/ 11, / cs=/ 10, / dc=/ 9, / reset=/ 8);
- U8G2_SSD1306_128X64_NONAME_F_4W_HW_SPI u8g2(U8G2_R0, / cs=/ 12, / dc=/ 4, / reset=/ 6); // Arduboy (Production, Kickstarter Edition)
- U8G2_SSD1306_128X64_NONAME_F_4W_HW_SPI u8g2(U8G2_R0, / cs=/ 10, / dc=/ 9, / reset=/ 8);
- U8G2_SSD1306_128X64_NONAME_F_3W_SW_SPI u8g2(U8G2_R0, / clock=/ 13, / data=/ 11, / cs=/ 10, / reset=/ 8);
- U8G2_SSD1306_128X64_NONAME_F_3W_HW_SPI u8g2(U8G2_R0, / cs=/ 10, / reset=/ 8);
- U8G2_SSD1306_128X64_NONAME_F_HW_I2C u8g2(U8G2_R0, / reset=/ U8X8_PIN_NONE);
- U8G2_SSD1306_128X64_ALT0_F_HW_I2C u8g2(U8G2_R0, / reset=/ U8X8_PIN_NONE); // same as the NONAME variant, but may solve the “every 2nd line skipped” problem
- …เยอะมาก
- U8G2_LS013B7DH05_144X168_F_4W_HW_SPI u8g2(U8G2_R0, / cs=/ 10, / dc=/ U8X8_PIN_NONE, / reset=/ 8); // there is no DC line for this display
- U8G2_ST7511_AVD_320X240_F_8080 u8g2(U8G2_R0, 13, 11, 2, 3, 4, 5, 6, A4, /enable/WR=/ 7, /cs=/ 10, /dc=/ 9, /reset=*/ 8); // Enable U8g2 16Bit Mode and connect RD pin with 3.3V/5V
By selecting the following items: This is because an I2C OLED display module based on the SH1106 chip is selected.
U8G2_SH1106_128X64_NONAME_F_HW_I2C u8g2(U8G2_R0, /* reset=*/ U8X8_PIN_NONE);
In case of display error, choose SSD1306 as follows
U8G2_SSD1306_128X64_NONAME_F_HW_I2C u8g2(U8G2_R0, /* reset=*/ U8X8_PIN_NONE);
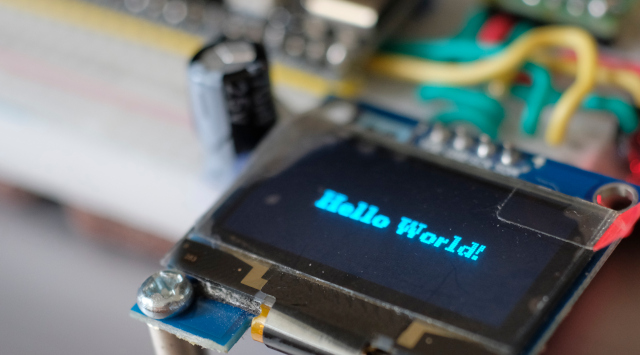
The program for displaying the message Hello (Hello, World) writes as follows, which results in the example of Figure 3.
#include <Arduino.h>
#include <U8g2lib.h>

//U8G2_SSD1306_128X64_NONAME_F_HW_I2C u8g2(U8G2_R0, /* reset=*/ U8X8_PIN_NONE);
U8G2_SH1106_128X64_NONAME_F_HW_I2C u8g2(U8G2_R0, /* reset=*/ U8X8_PIN_NONE);

void setup(void) {
  u8g2.begin();
}

void loop(void) {
  u8g2.clearBuffer();
  u8g2.setFont(u8g2_font_etl14thai_t );
  u8g2.drawStr(8,37, "Hello World!");
  u8g2.sendBuffer();
  delay(1000);
}
From the code, you can see that the buffer has been cleared. After that, draw it into the buffer and send buffer to display with sendBuffer() and delay 1 second.
#define U8G2_WITH_UNICODE
#include <Arduino.h>
#include <U8g2lib.h>

//U8G2_SSD1306_128X64_NONAME_F_HW_I2C u8g2(U8G2_R0, /* reset=*/ U8X8_PIN_NONE);
U8G2_SH1106_128X64_NONAME_F_HW_I2C u8g2(U8G2_R0, /* reset=*/ U8X8_PIN_NONE);

void setup(void) {
  u8g2.begin();
}

void loop(void) {
  u8g2.firstPage();
  do {
  u8g2.setFont(u8g2_font_etl14thai_t );
  u8g2.drawStr(8,37, "Hello World!");
  } while ( u8g2.nextPage() );
  delay(1000);
 }
Both methods have the same result, but the latter method looks at a multi-page execution method, starting with firstPage() then drawing the data and nextPage() updating the drawn data with a delay of 1 second.
Commands you should know
A command that should be known to base u8g2 is an object method that inherits from u8g2 with the following format. In the previous example, the display module object was created of type U8G2_SH1106_128x64_NONAME_F_HW_I2C under the name u8g2
driver obj( arg )
There are two arguments or parameters used:
- Layout style which has the following options:
- U8G2_R0 Horizontal display
- U8G2_R1 Rotate 90 degree from R0
- U8G2_R2 Rotate 180 degree from R0
- u8G2_R3 Rotate 270 degree from R0
- U8G2_MIRROR shows reversed with U8G2_R0 which can be ordered to setFlipMode() in the program.
Connected pin details, now it’s U8x8_PIN_NONE.
- obj.displayRotation( direction )
- obj.enableUTF8Print() To enable the display of characters in UTF8 format.
- obj.disableUTF8Print() To disable the display of characters in UTF8 format.
- Object.setFont( Font name to be used ) to select the font used for display.
- u8g2_font_etl14thai_t
- u8g2_font_etl16thai_t
- u8g2_font_etl24thai_t
- u8g2_font_ncenB08_tr
- u8g2_font_ncenB14_tr
- ETC.
- obj.drawStr( x, y, “text” ) display text at (x,y)
- obj.drawUTF8( x, y, “text” )
- obj.setDrawColor( color ) set the color for drawing to be 0 or 1
- length = obj.getStrWidth( text )
- length = obj.getUTF8Len( text )
- obj.setFontDirection( direction ) set the direction where
- 0 draw from left to right
- 1 draw from top to bottom
- 2 draw from right to left
- 3 draw from bottom to top
- obj.setFontMode( opacity )
- buffer = obj.getBufferSize()
- obj.clearBuffer() To clear the value in the buffer causing the displayed data to be deleted or ordered.
obj.firstPage() - obj.sendBuffer() Send data from the buffer to display in graphics module or use it in the form of
do {
…things…
} while (obj.nextPage()); - obj.initDisplay() Perform a display reset.
- obj.drawBitmap(x,y,cnt,h,image_buffer) where cnt is the number of bytes of the horizontal image (1 byte contains 8 bits, or 8 copies), whose width is cnt*8.
- วัตถุ.setBitmapMode( opacity ) If opacity mode is 0, it will overdraw, but if it is 1, it will overlay without drawing 0 over the previous data.
- obj.drawBox(x,y,w,h) Draw a solid box.
- obj.drawRBox(x,y,w,h,r) Draw a rounded solid box where r is the degree of the edge.
- obj.drawFrame( x, y, w, h ) Draw a box with a border.
- obj.drawRFrame( x, y, w, h,r ) Draw a rounded frame, where r is the edge angle.
- obj.drawCircle(x0, y0,rad) Draw a circle with opt having the following values:
- U8G2_DRAW_UPPER_RIGHT
- U8G2_DRAW_UPPER_LEFT
- U8G2_DRAW_LOWER_LEFT
- U8G2_DRAW_LOWER_RIGHT
- U8G2_DRAW_ALL
- obj.drawDisc(x0, y0, rad, opt=U8G_DRAW_ALL) draw a solid circle
- obj.drawEllipse( x0, y0, rx, ry, opt ) draw an ellipse where opt has the following values:
- U8G2_DRAW_UPPER_RIGHT
- U8G2_DRAW_UPPER_LEFT
- U8G2_DRAW_LOWER_LEFT
- U8G2_DRAW_LOWER_RIGHT
- U8G2_DRAW_ALL
- obj.drawFilledEllipse( x0, y0, rx, ry, opt ) Draw a solid Ellipse.
- obj.drawGlyph( x, y, อักขระ )
An example of how to draw a snowman from Glyph is as follows, an example is shown in Figure 4 and other examples are shown in Figure 5.
#define U8G2_WITH_UNICODE
#include <Arduino.h>
#include <U8g2lib.h>

//U8G2_SSD1306_128X64_NONAME_F_HW_I2C u8g2(U8G2_R0, /* reset=*/ U8X8_PIN_NONE);
U8G2_SH1106_128X64_NONAME_F_HW_I2C u8g2(U8G2_R0, /* reset=*/ U8X8_PIN_NONE);

void setup(void) {
  u8g2.begin();
}

void loop(void) {
  u8g2.firstPage();
  do {
    u8g2.setFont(u8g2_font_unifont_t_symbols);
    u8g2.drawGlyph(5, 20, 0x2603);  /* dec 9731/hex 2603 Snowman */
  } while ( u8g2.nextPage() );
  delay(1000);
}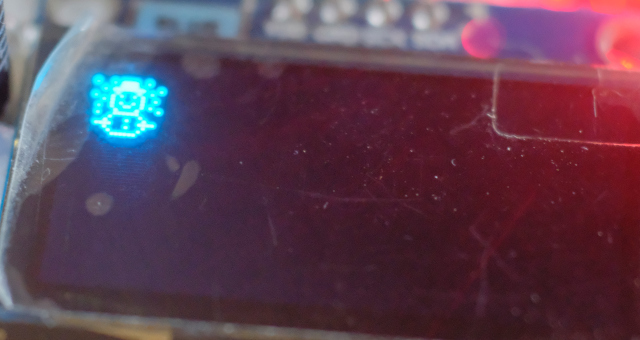

From https://github.com/olikraus/u8g2/wiki/fntpic/u8g2_font_unifont_t_symbols.png
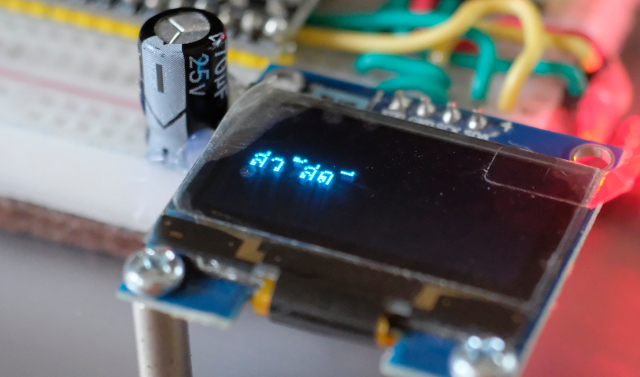
An example of using drawUTF8() to display text in a utf-8 Unicode encoding is as follows, and the resulting example is shown in Figure 6.
#define U8G2_WITH_UNICODE
#include <Arduino.h>
#include <U8g2lib.h>

//U8G2_SSD1306_128X64_NONAME_F_HW_I2C u8g2(U8G2_R0, /* reset=*/ U8X8_PIN_NONE);
U8G2_SH1106_128X64_NONAME_F_HW_I2C u8g2(U8G2_R0, /* reset=*/ U8X8_PIN_NONE);

void setup(void) {
  u8g2.begin();
}

void loop(void) {
  u8g2.firstPage();
  do {
  u8g2.setFont(u8g2_font_etl14thai_t );
  u8g2.drawUTF8(8,37, "สวัสดี");
  } while ( u8g2.nextPage() );
  delay(1000);
 }
- วัตถุ.drawHLine(x,y,w) Draw a horizontal line
- วัตถุ.drawVLine(x,y,h) Draw a vertical line
- วัตถุ.drawLine(x0, y0, x1, y1) Draw a straight line from (x0,y0) to (x1,y1).
- วัตถุ.drawPixel( x, y )
- วัตถุ.drawTriangle(x0,y0,x1,y1,x2,y2) Draw a triangle
- วัตถุ.drawXBM(x,y,w,h,buffer) Draw buffers that are in XBM format.
- วัตถุ.drawXBMP(x,y,w,h,buffer) Draw buffers that are in XBMP format.
- uint8_t = obj.getAscent() Find the height of the character by measuring the distance from the baseline.
- uint8_t = obj.getDescent() Find the height of an object by measuring the distance from the base line down.
- height_of_screen = obj.getDisplayHeight()
- width_of_screen = obj.getDisplayWidth()
- height_of_char = obj.getMaxCharHeight()
- width_of_char = obj.getMaxCharwidth()
- obj.setClipWindow(x0,y0,x1,y1) window frame, this prevents drawing parts that are within a given frame.
- obj.setContrast( difference ) Adjusts the display contrast level by setting it to an integer value in the range 0 to 255.
- obj.setCursor( x, y ) Move the display position to the yth row, the xth column, based on the font size.
- obj.print( data ) display information at the cursor
- obj.updateDisplay() Screen update
- obj.updateDisplayArea( tx, ty, tw, th ) Update only in frame (tx,ty) – (tx+tw, ty+th)
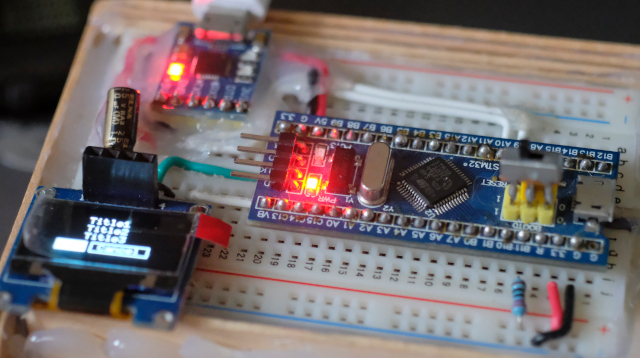
Example of use with SSD1306 and STM32F103 microcontroller as shown in Figure 7.
#define U8G2_WITH_UNICODE
#include <Arduino.h>
#include <U8g2lib.h>

U8G2_SSD1306_128X64_NONAME_F_HW_I2C u8g2(U8G2_R0, /* reset=*/ U8X8_PIN_NONE);
//U8G2_SH1106_128X64_NONAME_F_HW_I2C u8g2(U8G2_R0, /* reset=*/ U8X8_PIN_NONE);

void setup(void) {
  u8g2.begin();
}

void loop(void) {
  u8g2.firstPage();
  do {
    u8g2.setFont(u8g2_font_6x10_tf);
    u8g2.setFontRefHeightAll();    /* this will add some extra space for the text inside the buttons */
    u8g2.userInterfaceMessage("Title1", "Title2", "Title3", " Ok \n Cancel ");
  } while ( u8g2.nextPage() );
  delay(1000);
}
Conclusion
From this article, you will find that using the u8g2 to control the display of OLED modules makes programming easier and works fast. It is also compatible with a wide range of microcontrollers. However, we did not provide details on the user interface as additional circuits are required to be used as inputs from users. If there is a chance, we will continue to improve this article. Finally, have fun with programming.
If you want to talk with us, feel free to leave comments below!!
Reference
- u8g2
- u8g2 reference
- kritsada arjchariyaphat, “Let microcntroller display thai language on LCD“
(C) 2020-2021, By Jarut Busarathid and Danai Jedsadathitikul
Updated 2021-11-19